How to automatically ingest Procore data into Toric and push it into an external data table

Toric is a data analytics workspace specializing in data movement and data ingestion pipelines for all major construction data sources, including project management software like Procore. Toric provides you with access to your Procore data (i.e., RFIs, Budget Items, Logs, and more) from 120+ Procore API Endpoints for better project and portfolio insights across any/all active or inactive, and make it analysis-ready in a destination of your choice. Toric allows you to visualize your Procore data, and use Automations to update your Procore data ingestion pipeline in near real-time.
In this tutorial post, we will walk through how to automatically ingest Procore data into Toric and push it into an external data table without writing any code. We’ve written the following guides below to get you started, and if you get stuck on a step or have any questions, feel free to contact us.
Let’s get into the tutorial!
Setting Procore's Connector up in Toric
- Install Toric App on Procore
- Set up the Procore connector in Toric
- Configure Procore Webhook (if webhook is wanted)
- Grant Toric Connector appropriate permission on Procore (these steps are also outlined in the “Install Toric App on Procore” article above.
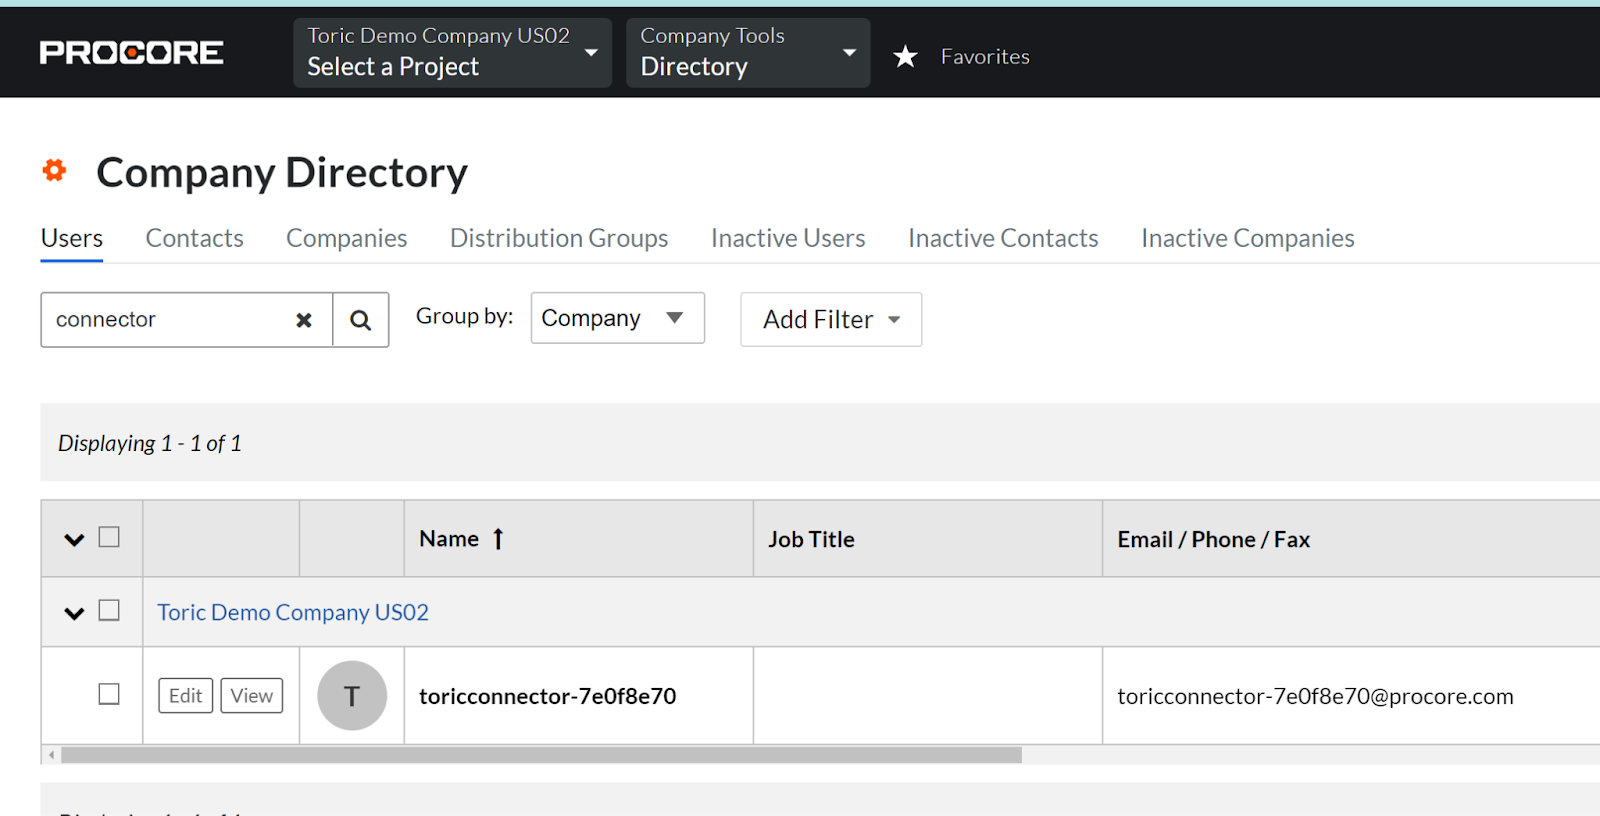
- Under the Procore Directory, search for the Toric Connector under Users.
- Click on Edit to update the Toric Connector’s permission

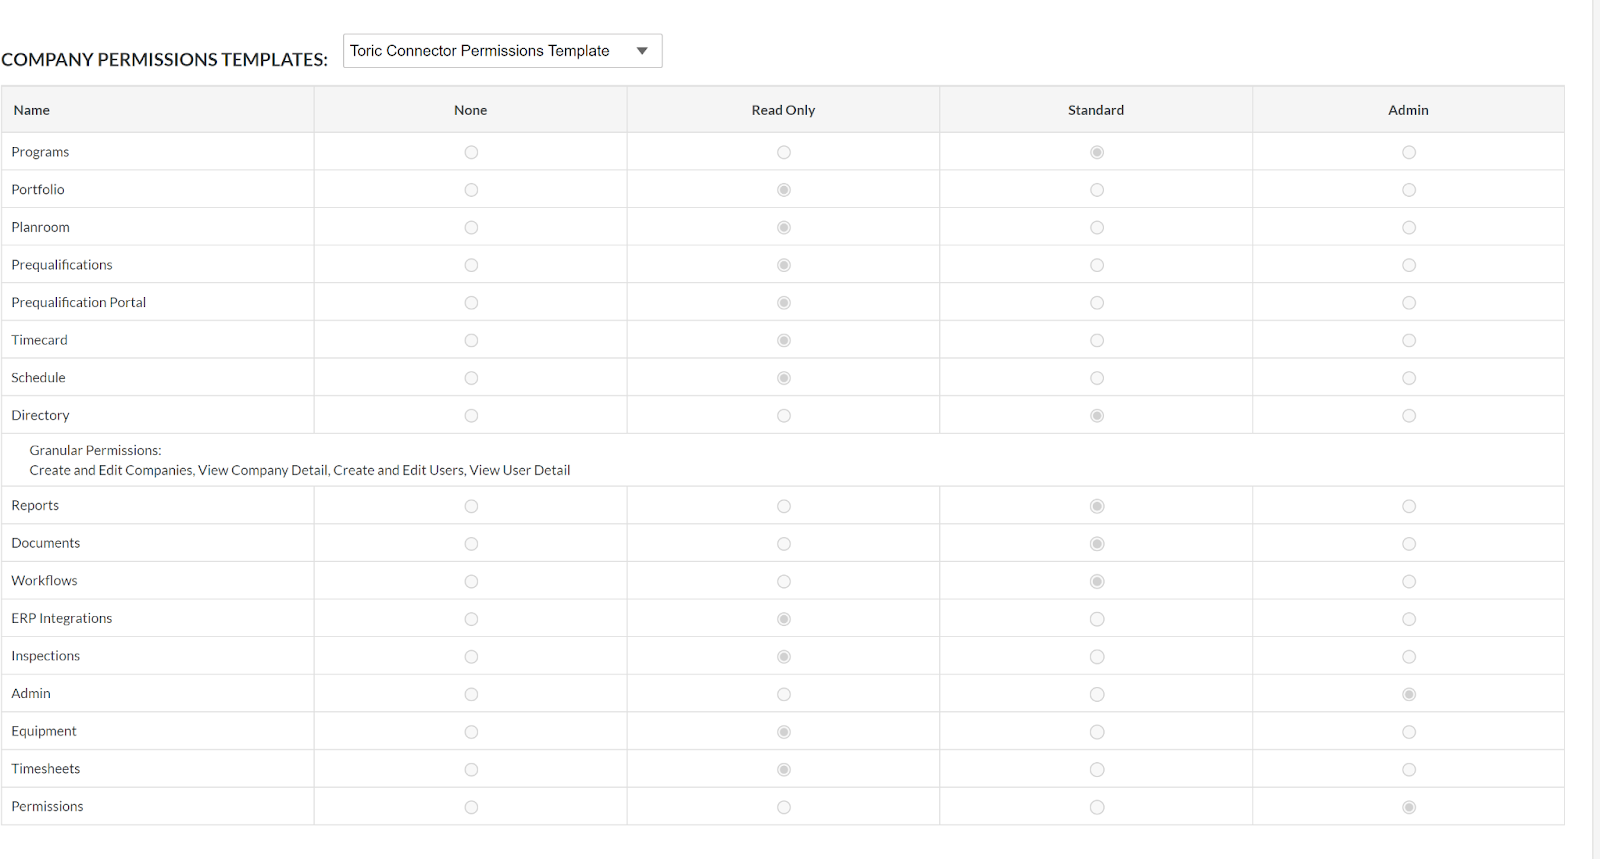
- Create a Toric Connector Permissions Template and grant Toric's Connector the appropriate permission level.
- Apply the template to all Projects for Toric's Connector.


Creating an Automation for Ingesting Procore Data
- Getting started with Automation https://www.toric.com/support/automations
- Automation Triggers https://www.toric.com/support/automations-triggers
- Automation Action https://www.toric.com/support/automations-actions
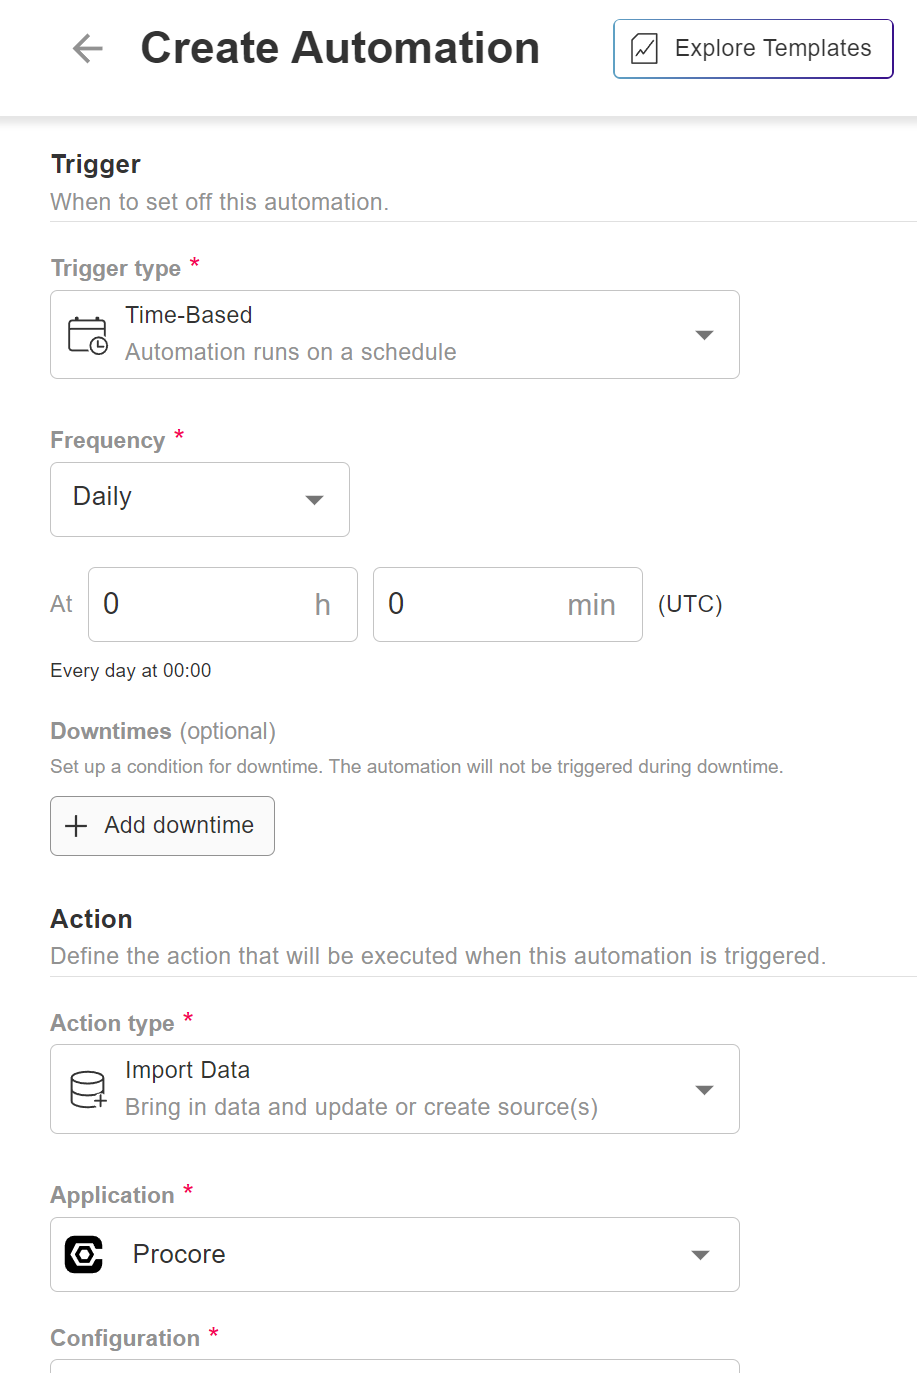
- For ingesting Procore data, the automation trigger can be:
- Manual
- Time-based
- Webhook
- The Automation action, in this case, will always be Import Data.
- The Application will always be Procore.

Strategy on creating Toric folders for Procore Endpoints
Depending on how the Procore Endpoint data will be processed, there are different strategies for creating Toric folders for them. Below are three common options for creating Toric Folders for Procore Endpoints.
Option 1: Create a Toric folder for each Procore Endpoint
If you have different methods to process each Procore endpoint, you might want to consider creating Toric folders for each endpoint separately. This is the most versatile option that allows you to process each Procore endpoint differently.
Option 2: Create one Toric folder for LIST Endpoints and one Toric folder for SHOW Endpoints
With this strategy, you process all LIST endpoints in the same way and all SHOW endpoints in the same way. This is particularly useful when you have different methods of processing each endpoint.
Option 3: Create one Toric folder for Company level Procore Endpoint and one Toric folder for Project level Procore Endpoint
With this strategy, you process all company level endpoints in the same way and all project level endpoints in a different way. This is useful when you want to segregate the data based on its level in the organizational hierarchy.
Understanding Procore source file data structure
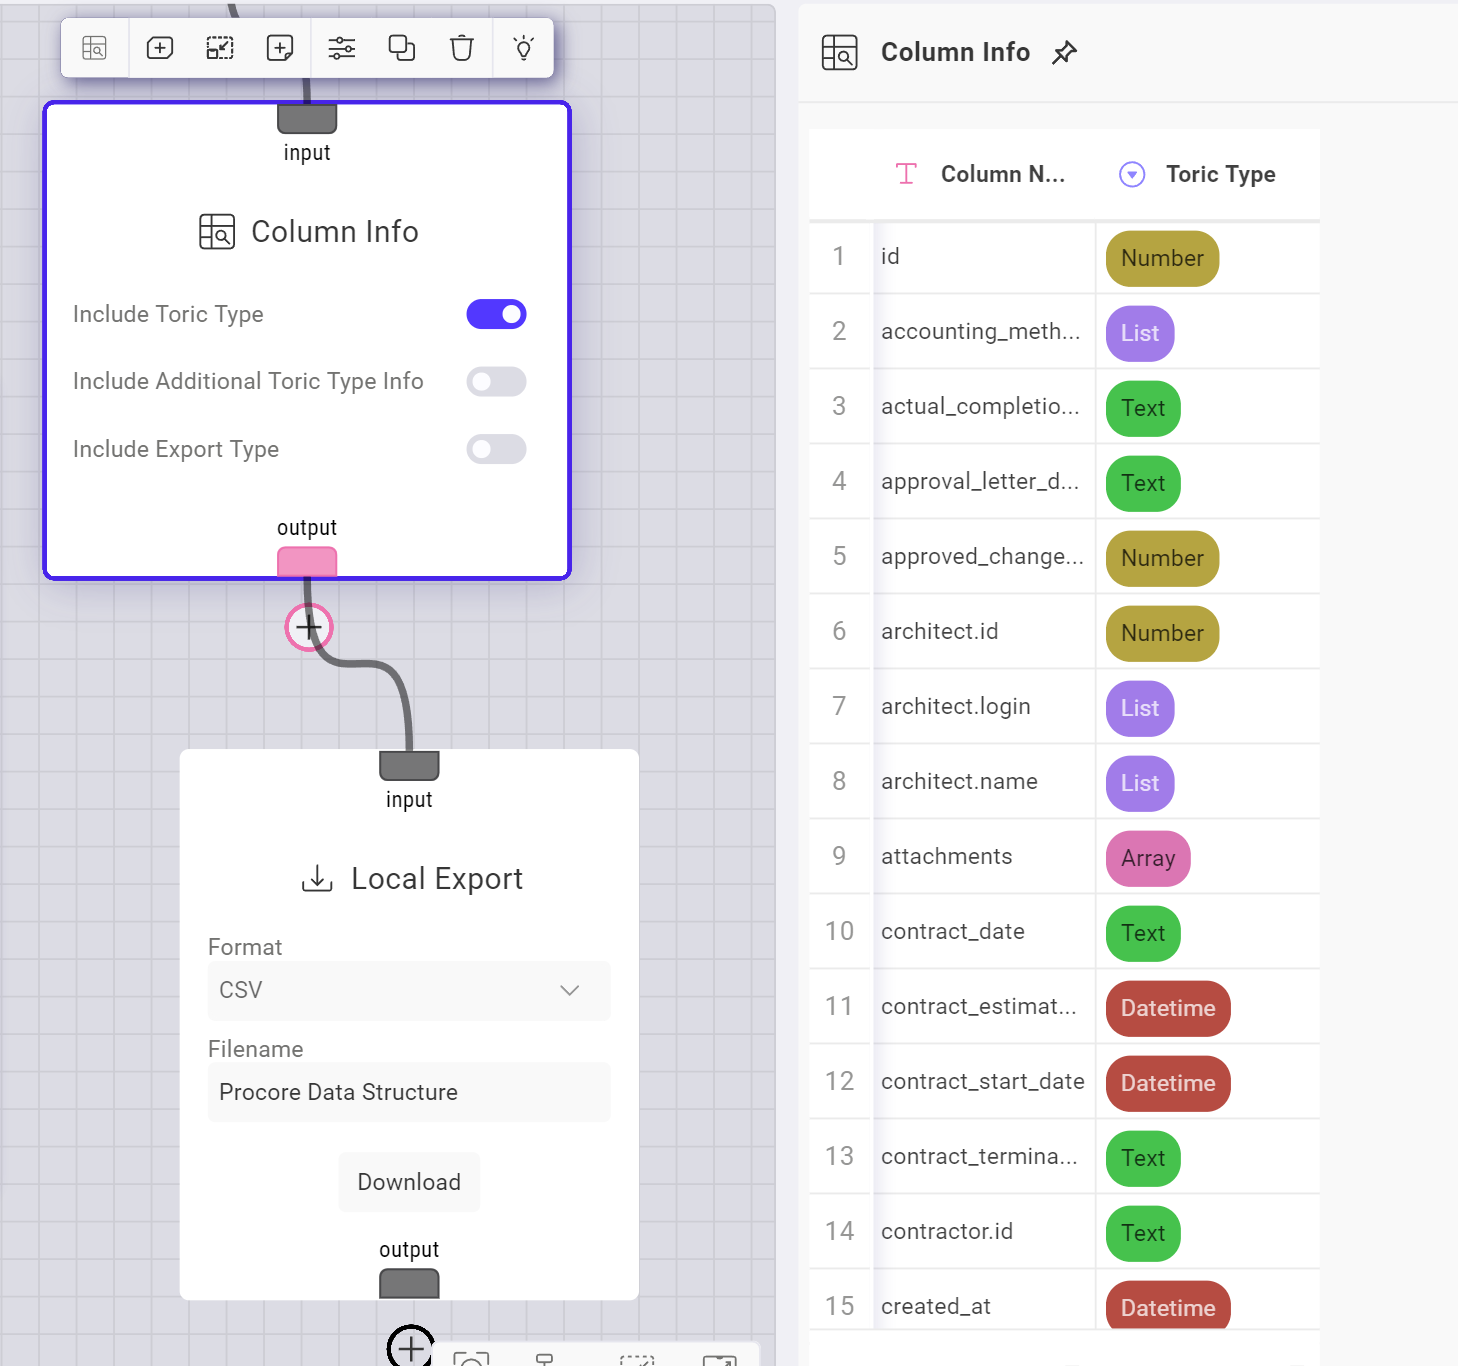
To understand the Procore Source file data structure, you can use the Column Info node and Local Export node. You need to turn on the Include Toric Type option to know the data type you would receive.

Connecting to External Database
Toric also supports externally managed data warehouses that can be connected to the platform. However, Toric cannot create tables in external warehouses, and the types of data that can be written are limited to the capabilities of that warehouse technology.
- Configure the MS SQL Server Connector in Toric
- In Toric, click on Data Table
- Click on External Tables
- Click on New Connected Table and fill out the information
- Fill in the following configuration information:
- Table Name
- Application: MS SQL
- Configuration: Choose the configuration you created
- Table: Select the table to which you want to push data.
Sending Procore data from Toric to External Database
To transfer Procore data from Toric to an external database, you can use a Write to Warehouse node in the Dataflow.
- Select the external Data Table from the Destination warehouse dropdown
- Map columns according to how your external table is set up
- After mapping all the columns, you can check the Export when Automating box to automate the writing to the warehouse.
Creating automation for pushing data
To push Procore data, set the automation trigger to Source Updated and the automation action to Run Dataflow. The application in question is Procore.
To add input overrides, click on the Add Override button.

You have now completed the tutorial!
Now that you have completed the steps above, your data will automatically ingest into Toric and push into an external data table! If you’re using Toric for data engineering, you can also use automations to trigger clean, processed data to be pushed to an external database. If you’re using Toric for data visualzation, like this real-time project dashboard, these same automations will keep your data up to date. Using this, you can create an automated path to ensure your data is in the format your business needs in an external database, and within your dashboards or reports.
Get started with Toric
I hope you enjoyed this tutorial on using Toric to push Procore data to an external database. If you haven't already, we encourage you to sign up for a free account and start exploring the workspace with course videos.
And if you need any help getting started, don't hesitate to request a demo with our team to learn more about how Toric can help you manage your projects more efficiently. Try out Toric for free today and see for yourself the power of our all-in-one data analytics workspace.


.png)


.png)


