
How to get started FREE with Toric using standard sources like CSVs and Excel files
Toric is a data analytics workspace that provides a user-friendly, SaaS-based solution for construction companies. It offers a scalable, low-code approach to solving data integration, engineering, and visualization challenges without requiring any coding knowledge.
In this post, we'll walk through how to get started with Toric's free plan, using standard sources like CSVs and Excel files. We'll guide you through the step-by-step process so you can try it out for yourself and experience the benefits of Toric's all-in-one data analytics workspace.
Now let's get started!
Let's start by importing a local CSV or Excel file into Toric's data analytics workspace. This is a quick and easy way to get started with analyzing your data in Toric for free. Other standard sources that are available for free users include Google Sheets or Google Drive.
How to Import a Local CSV or Excel File
If you have data saved locally as a CSV or Excel file on your computer, you can easily import it into Toric by following these steps:
- Go to any existing data flow or create a new data flow.

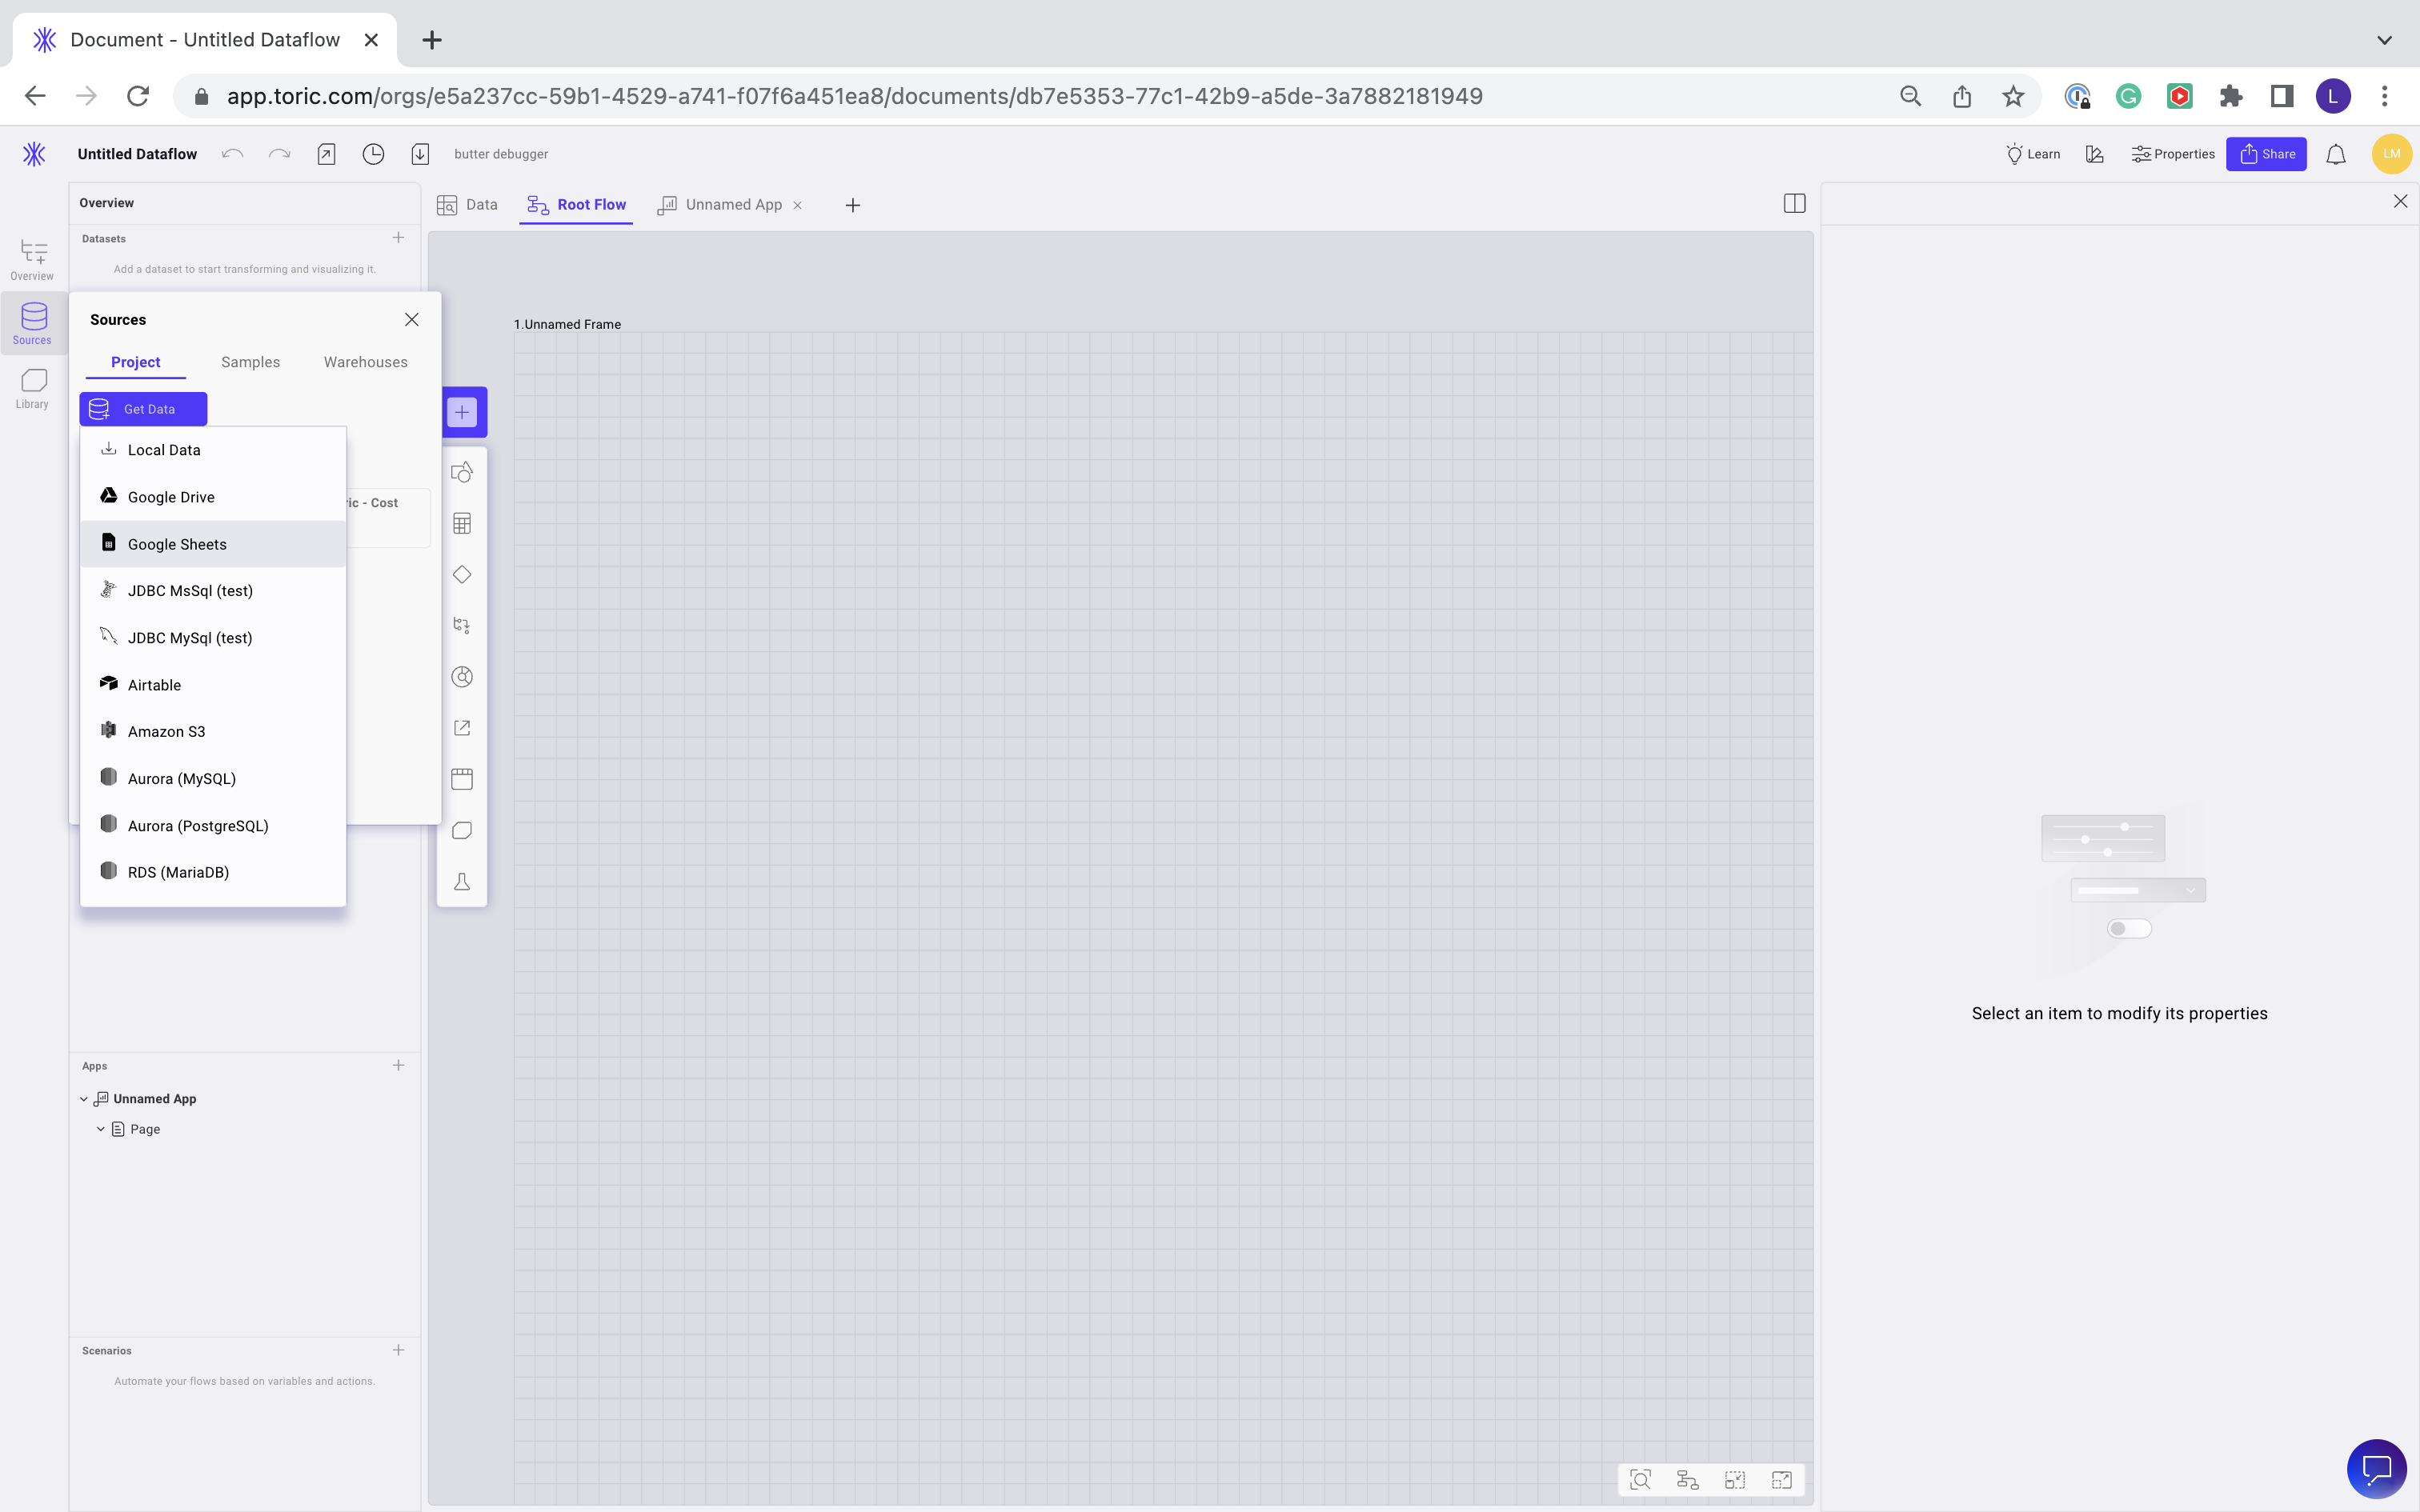
- Click on the "Sources" tab in the left-hand navigation bar of your Toric dashboard. Select Get data and Local import.
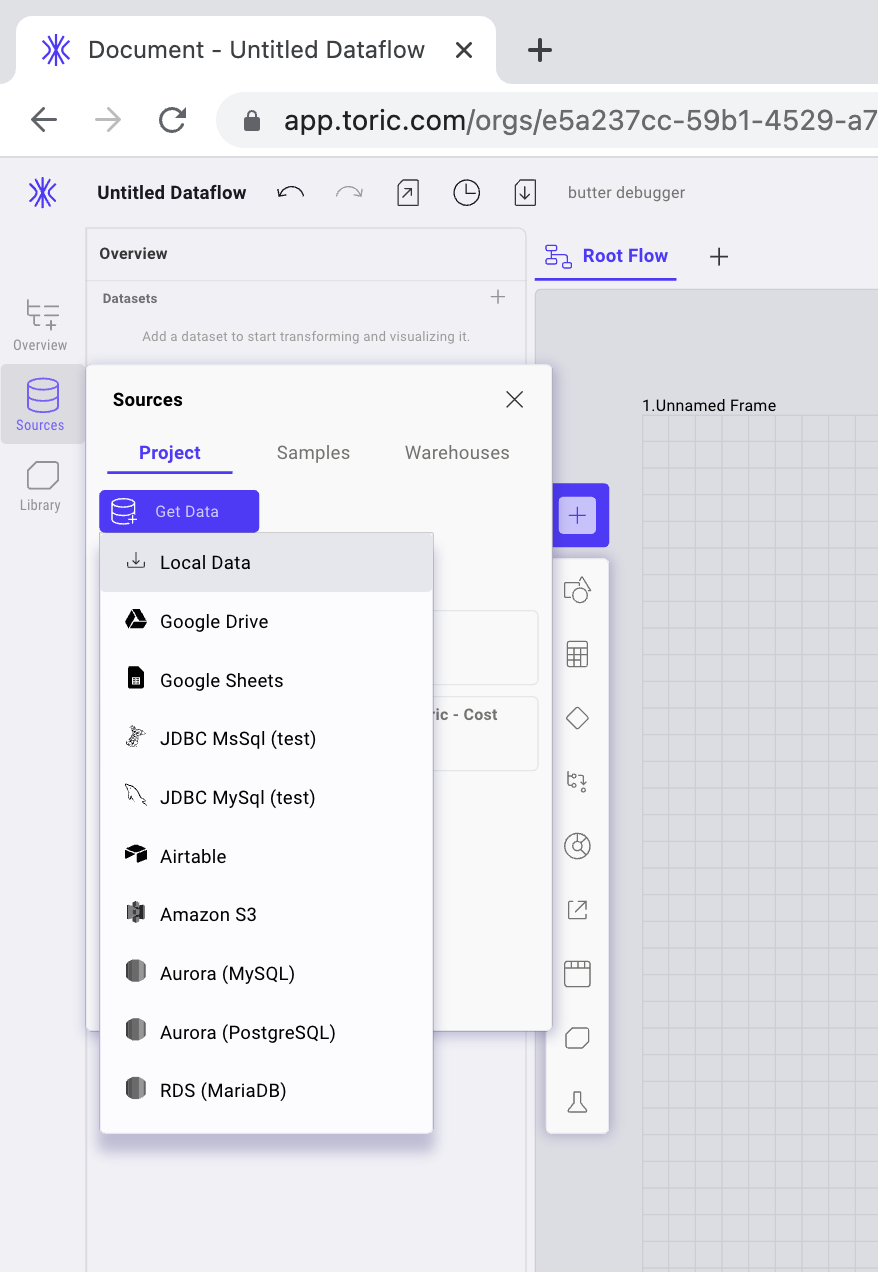
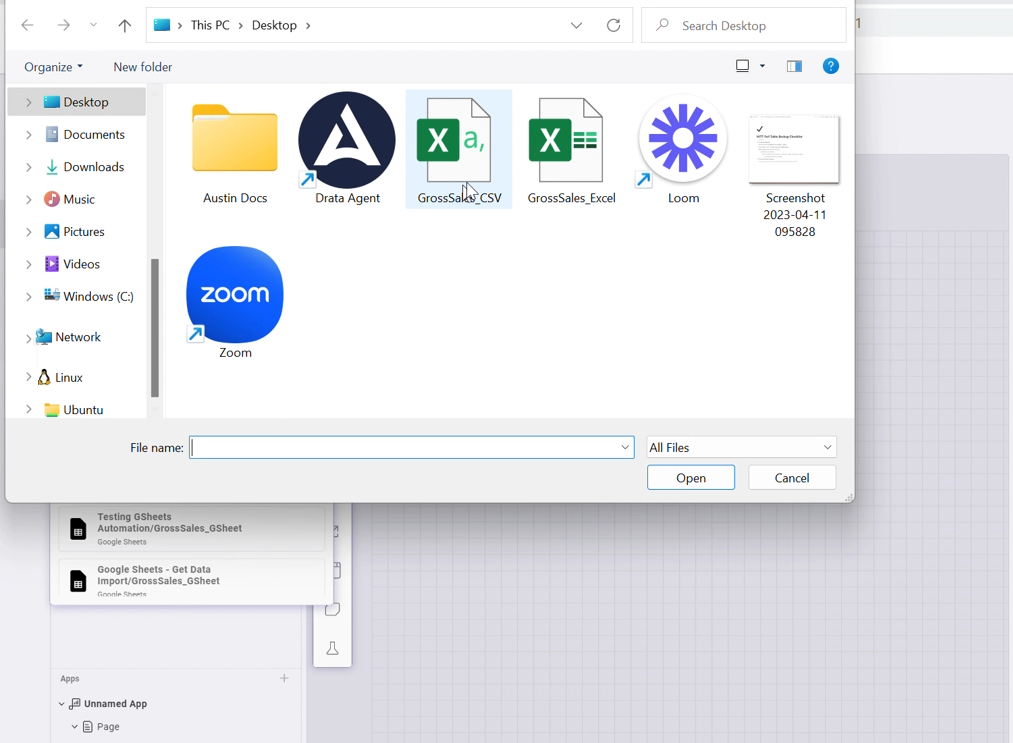
- Click on the CSV or Excel file you would like to import.
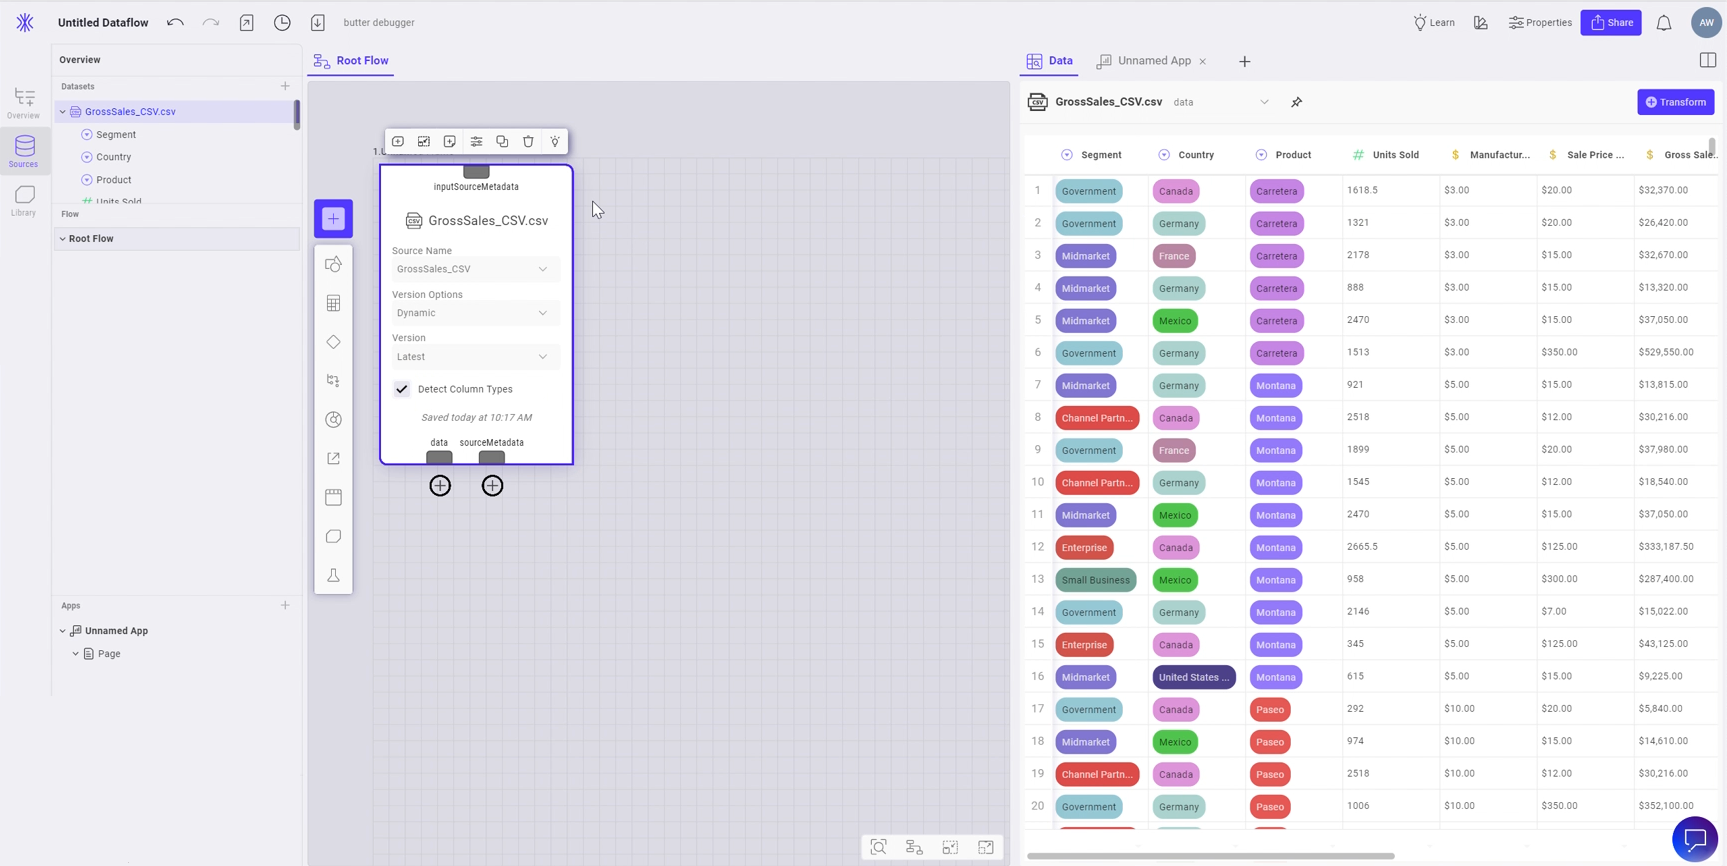
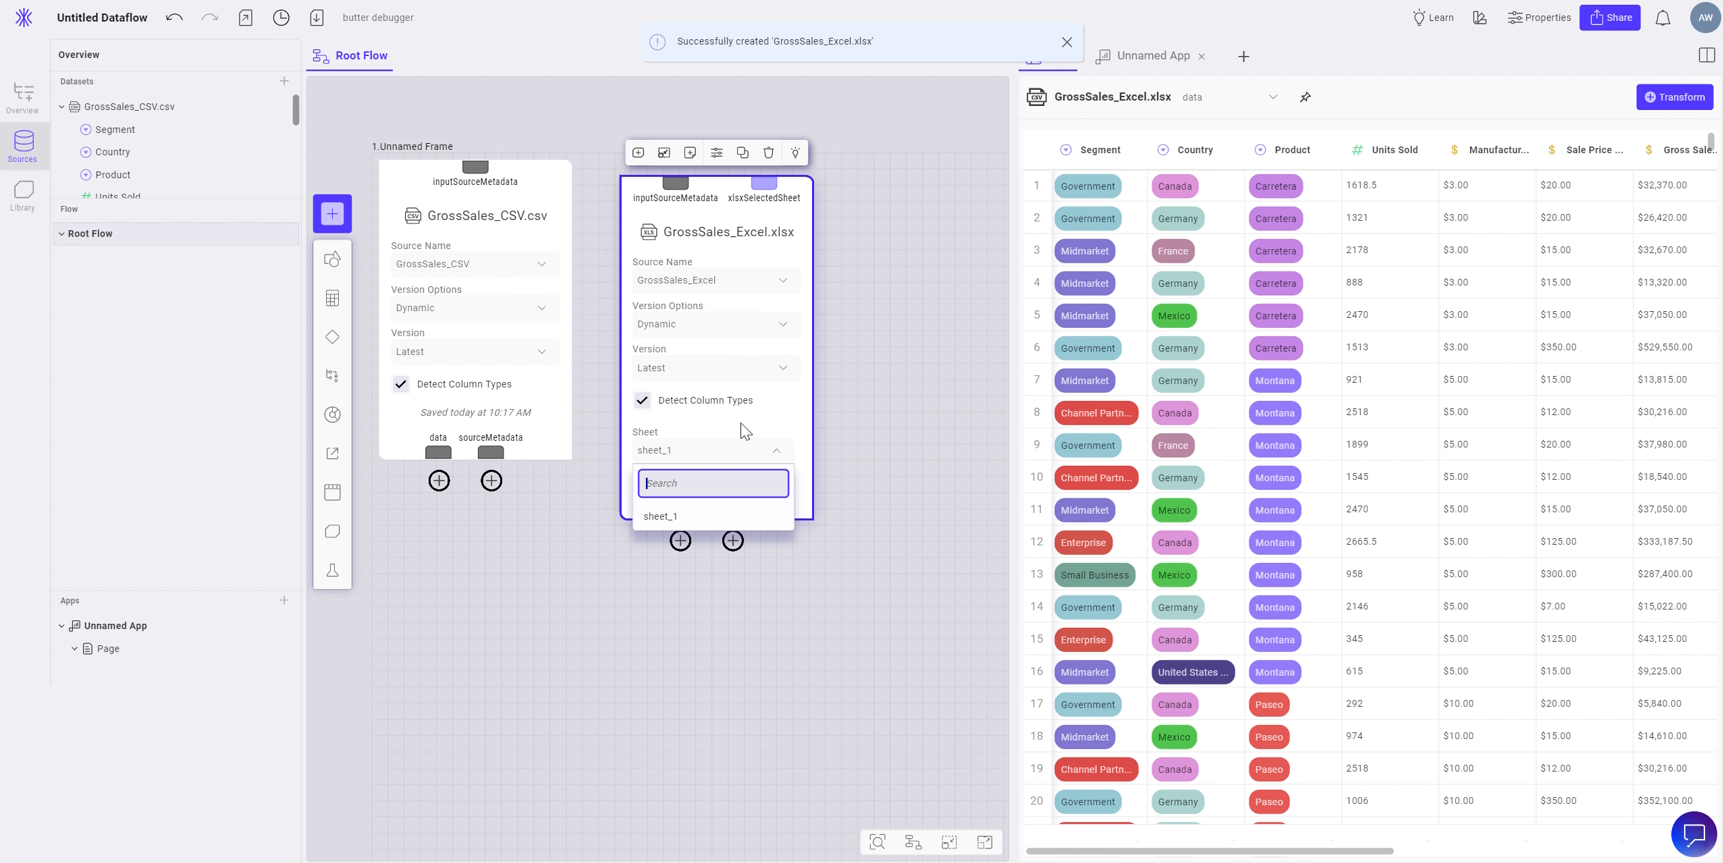
- This will create a new source node in your flow. You can see your data and changes live in an interactive data table if you toggle on the split workspace.
- Repeat this process for an additional CVS or Excel file to analyze data sets between two file types.
Your local file is now connected to Toric, and you can start using it to build project plans and visualizations. Here are some of the templates available for free users that use a CVS or Excel file as a source:
How to Configure Google Sheets
Google Sheets is a widely used spreadsheet application, and many people already have their project data in this format. Configuring Google Sheets in Toric is straightforward. Follow these steps:
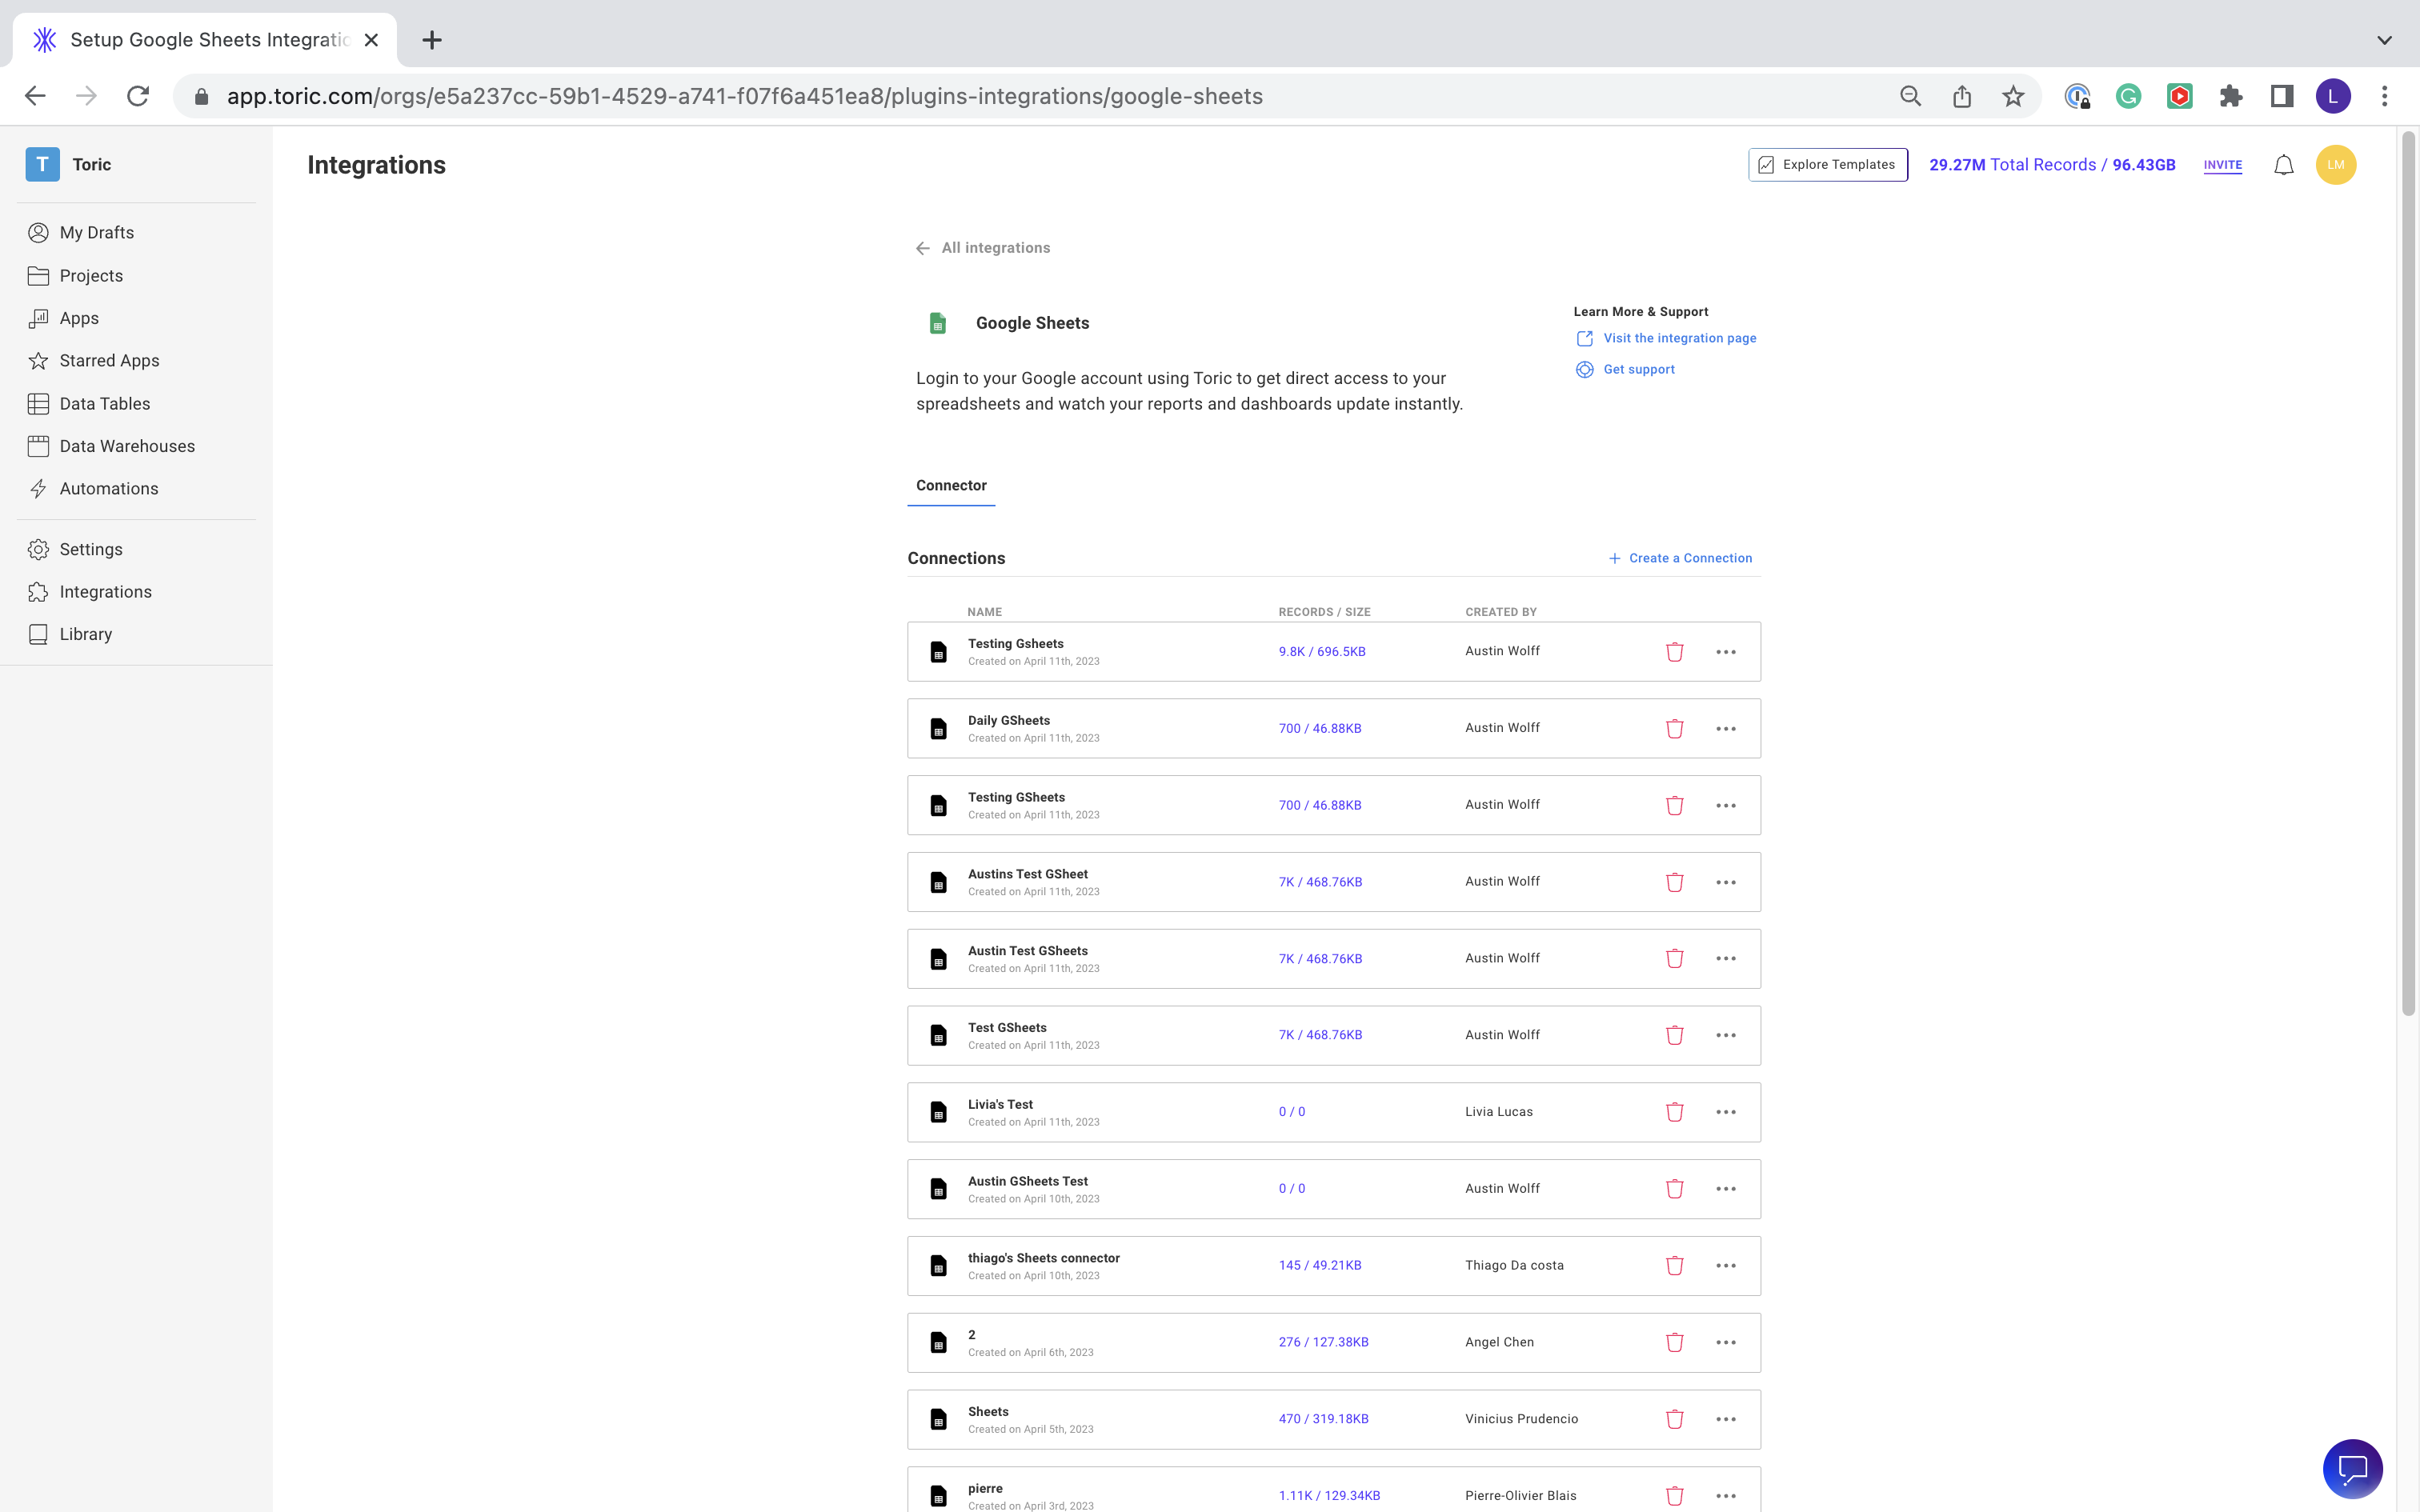
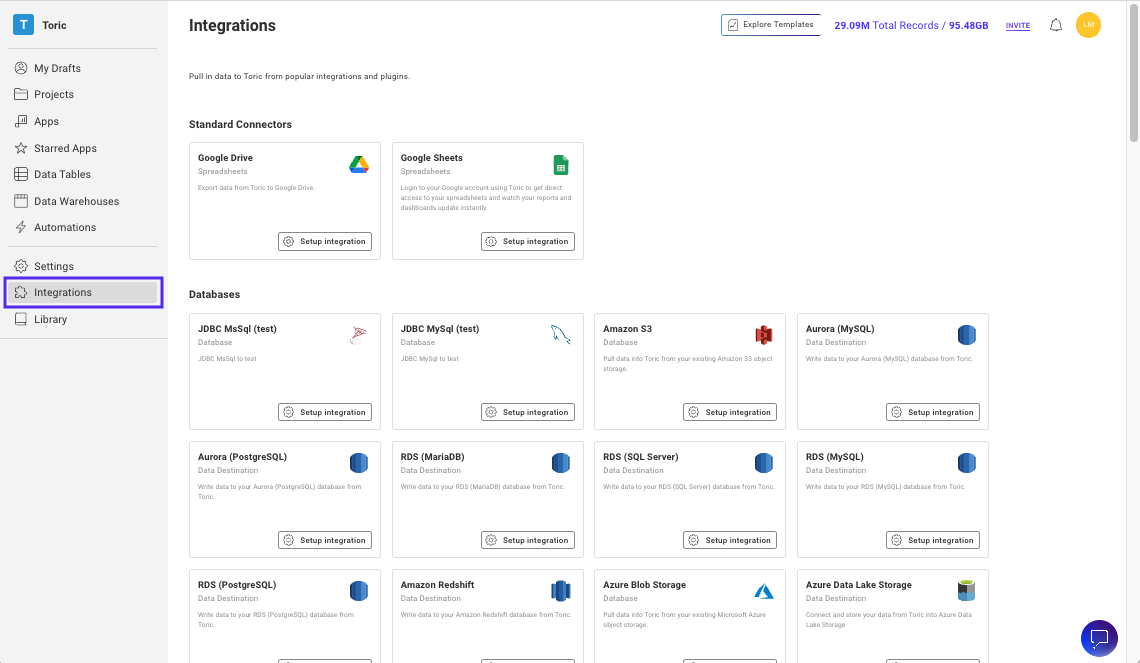
- Click on the "Integrations" tab in the left-hand navigation bar of your Toric dashboard.

- Click on the "Setup Integration" button under "Google Sheets." You will be brought to the connectors screen. Click Create a Connection.
3. Give your connection a custom name.
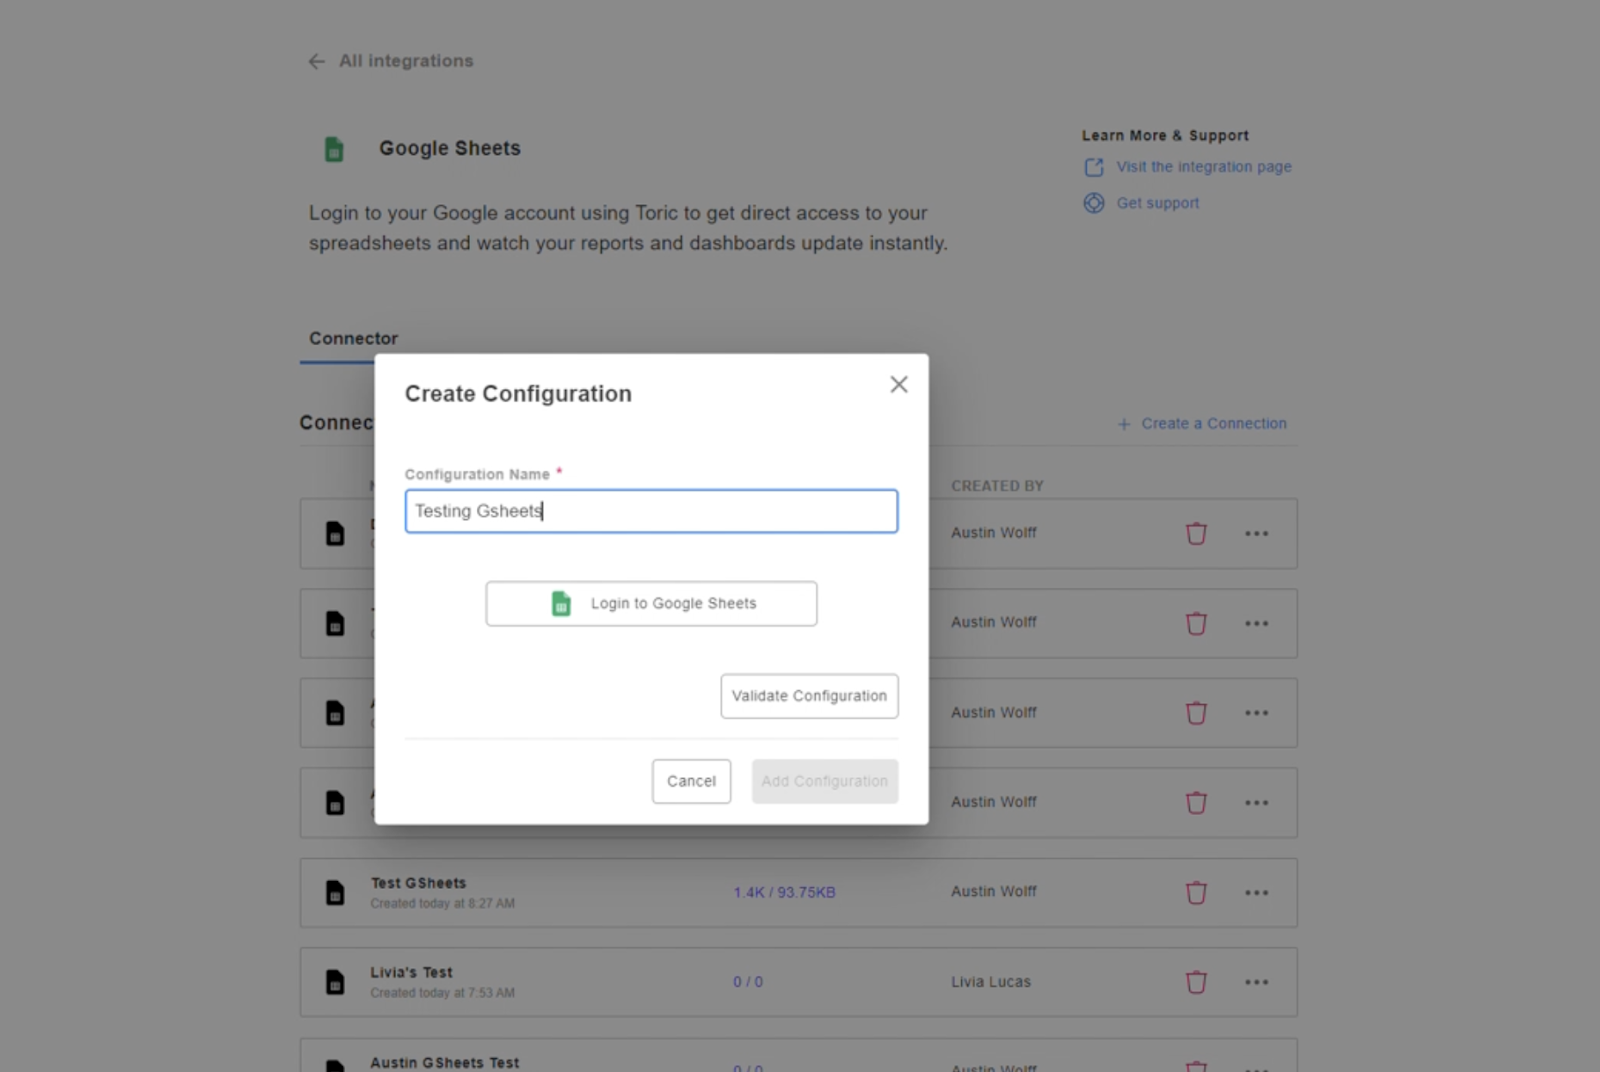
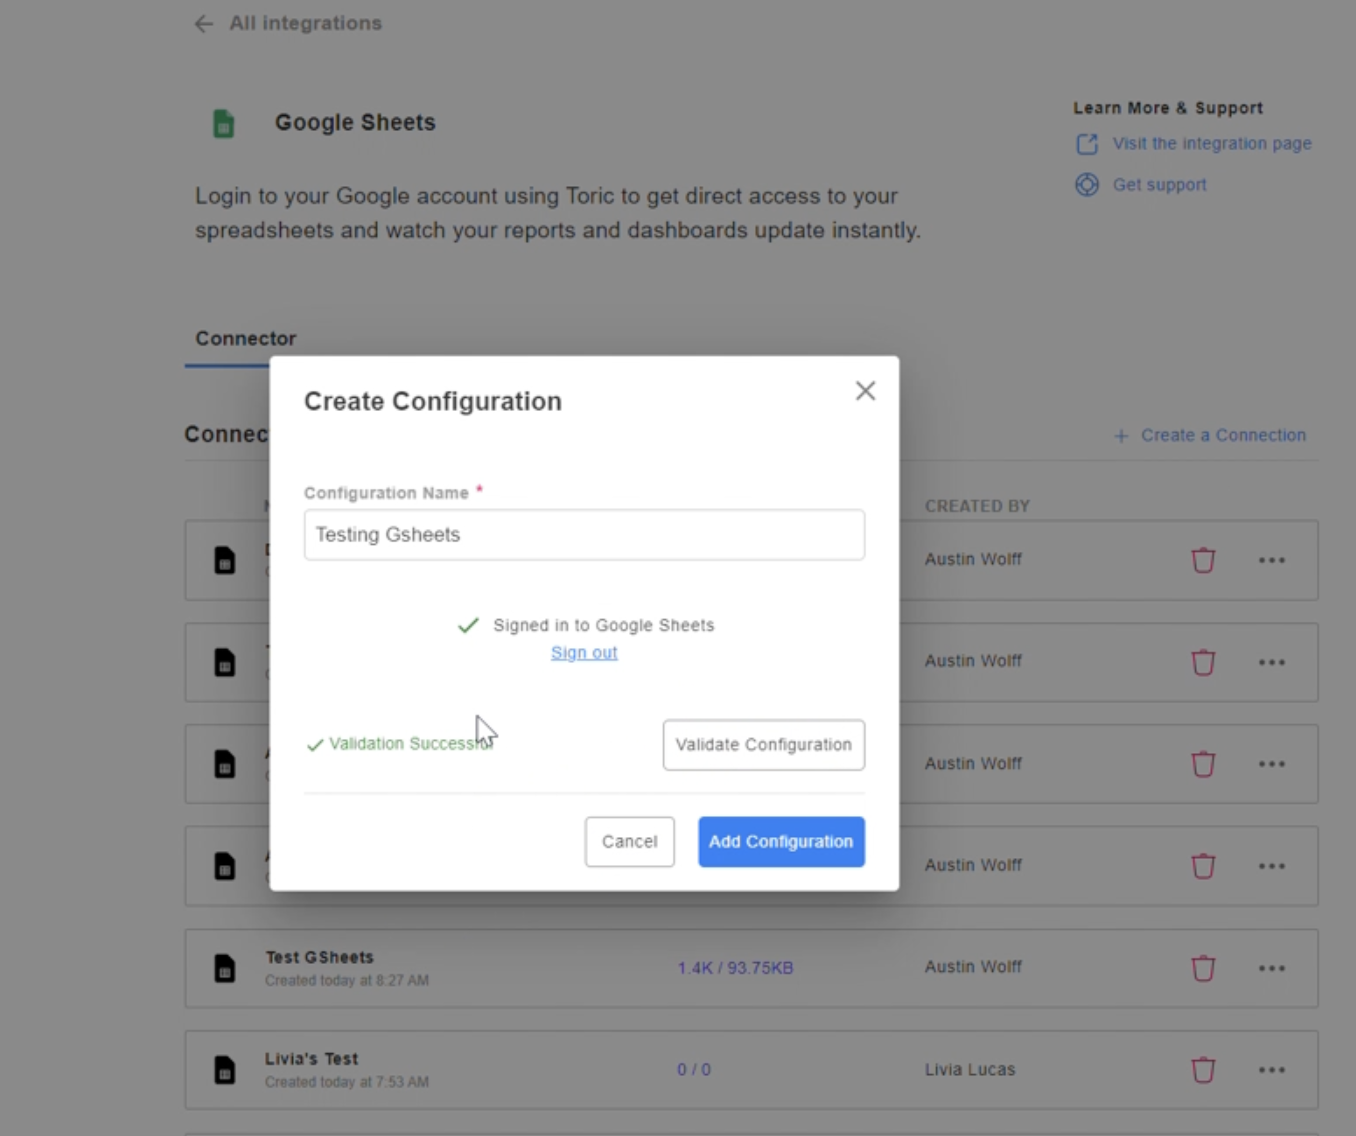
- You will then be prompted to sign in.
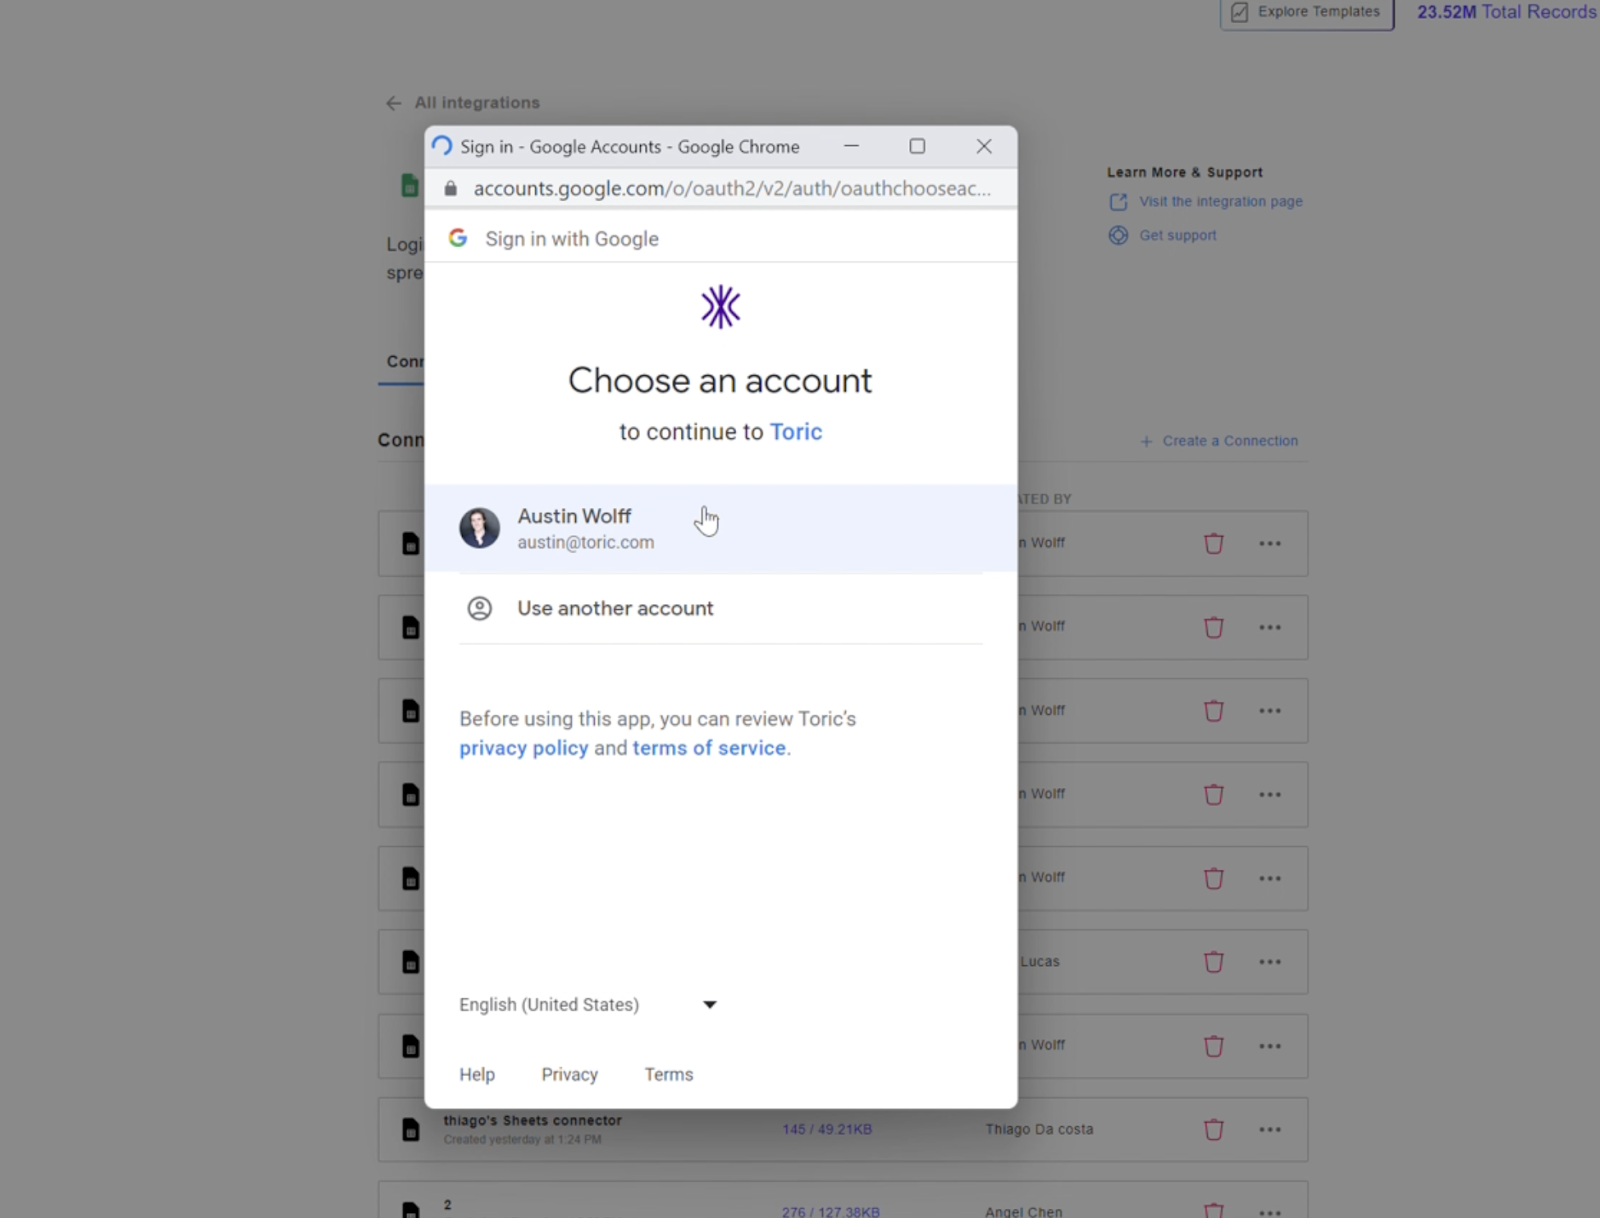
- Once signed in, select the validate button to validate your configuration.
- We need to create a new project to use your Google Sheet data. In the left-hand menu, go to My Drafts.
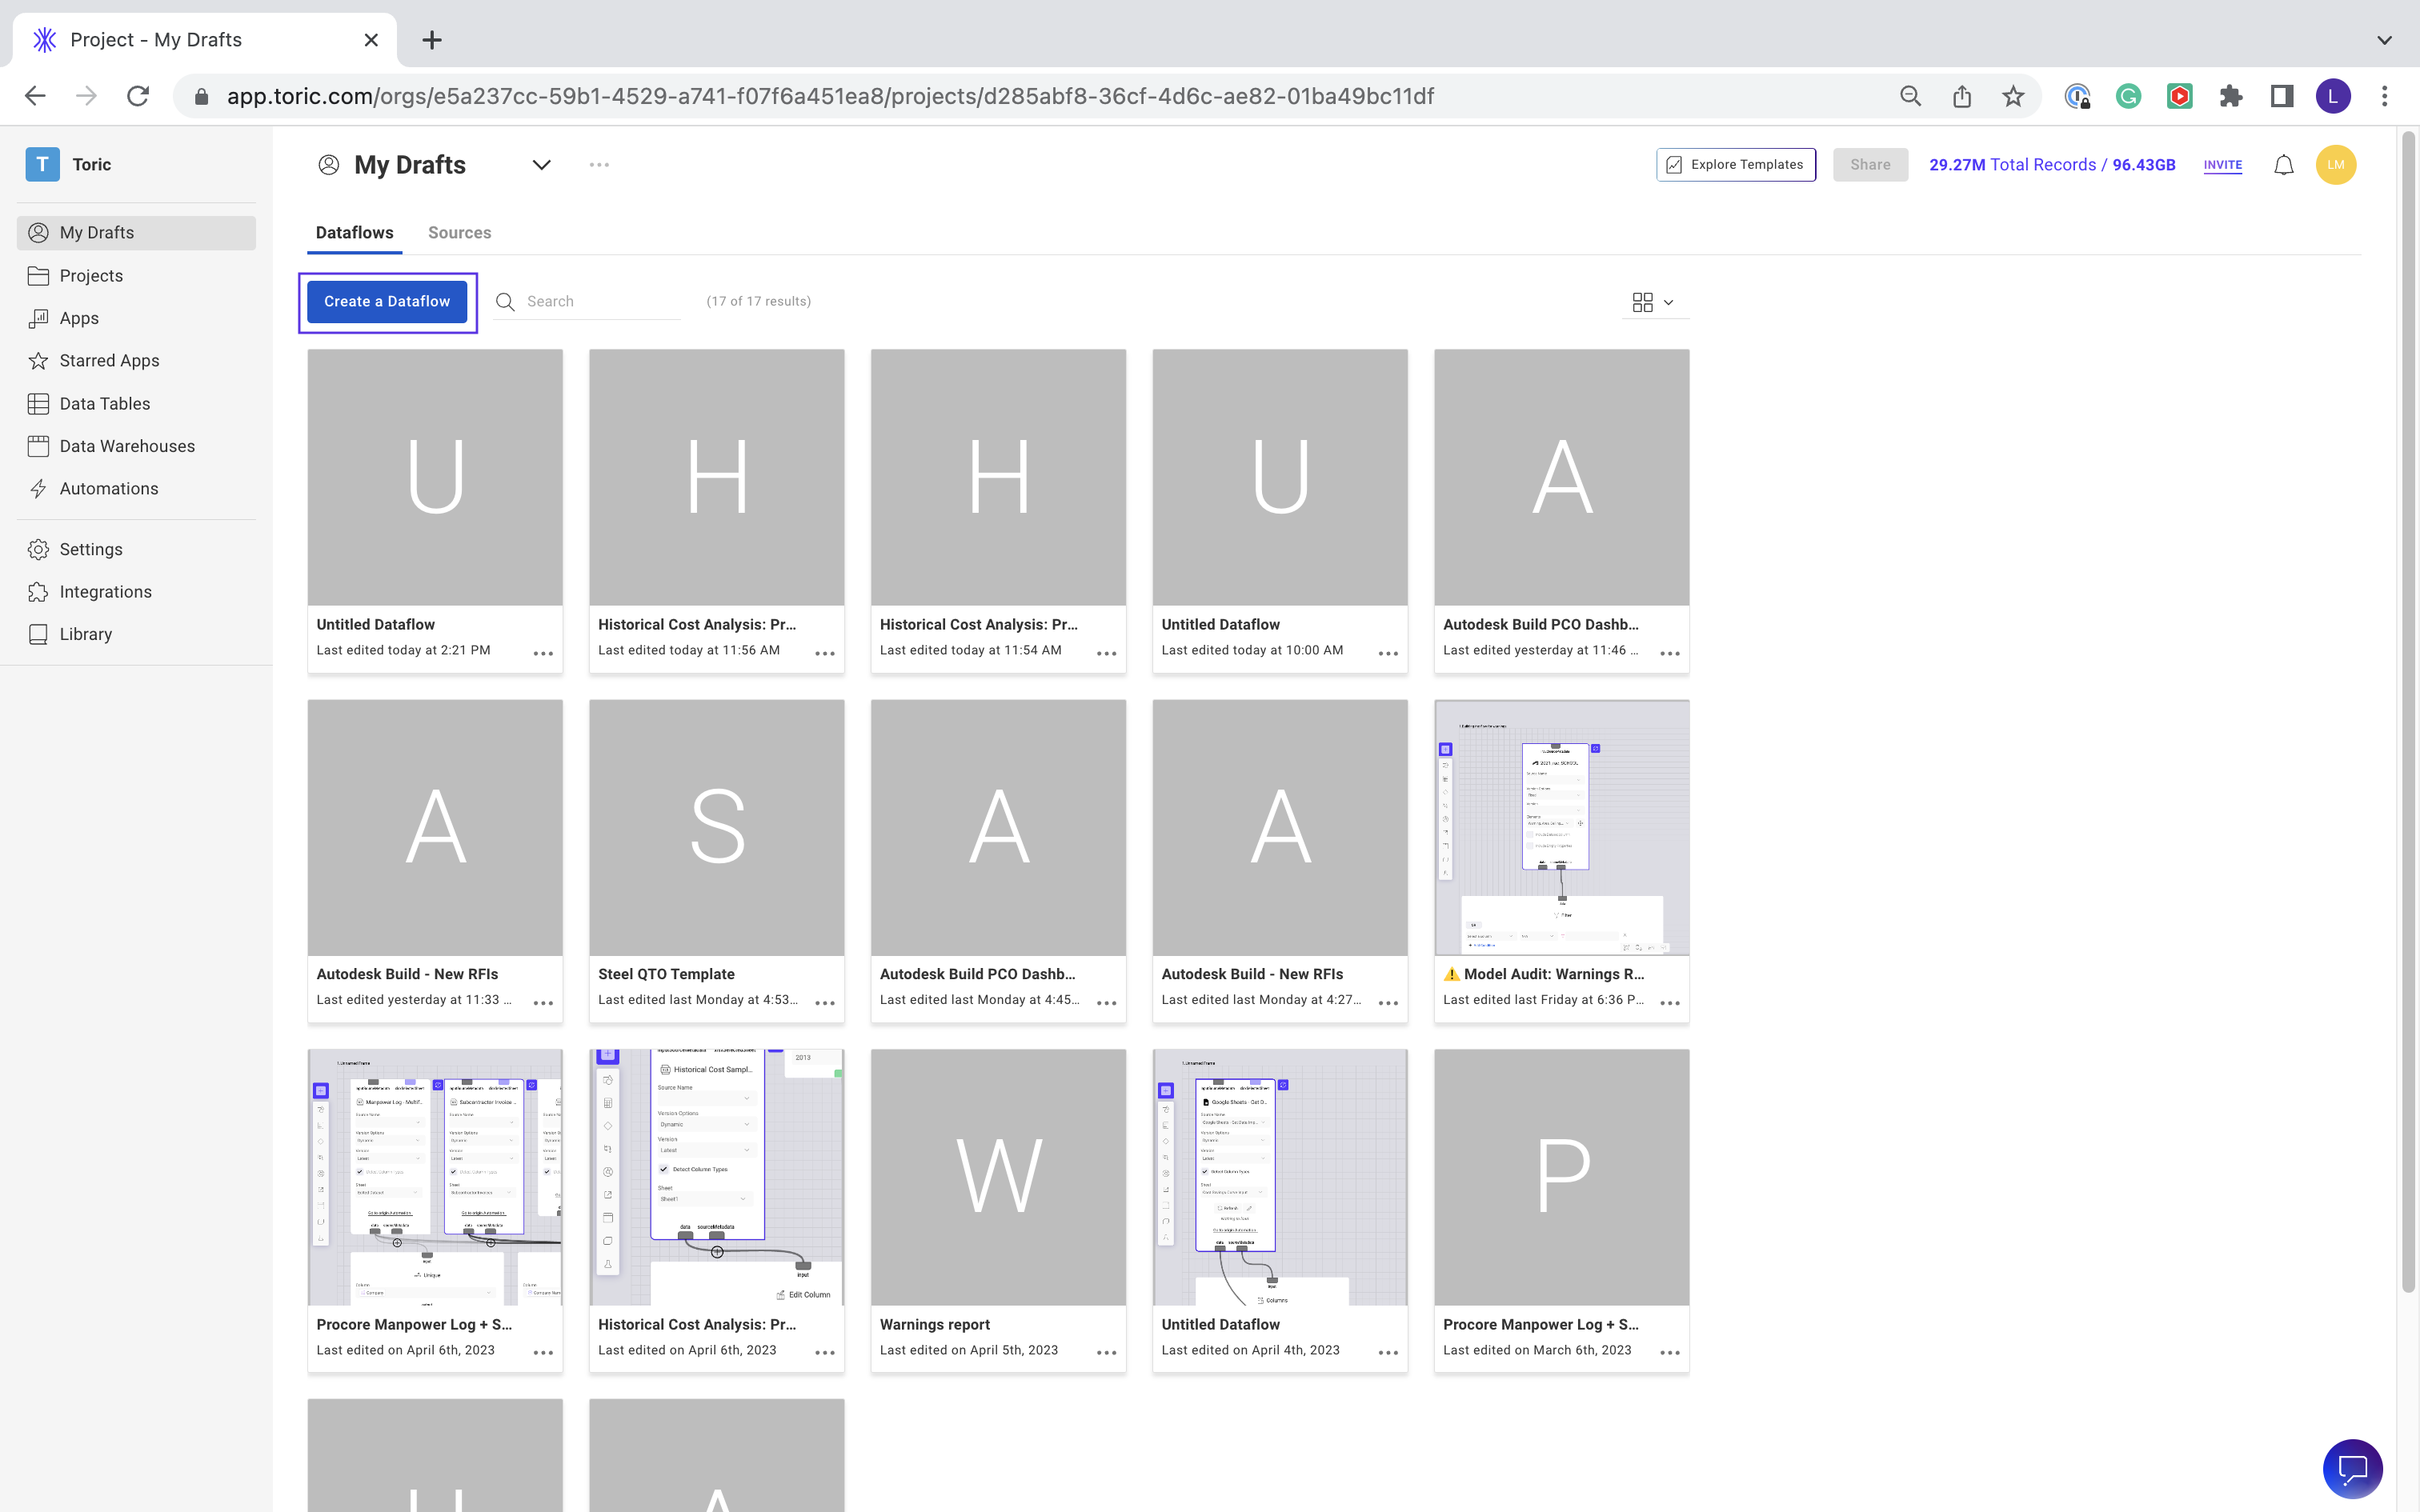
- Select Create a dataflow. You will be prompted with three options on this screen, and we want to select New Flow.

- You should now see a blank data flow that looks like this
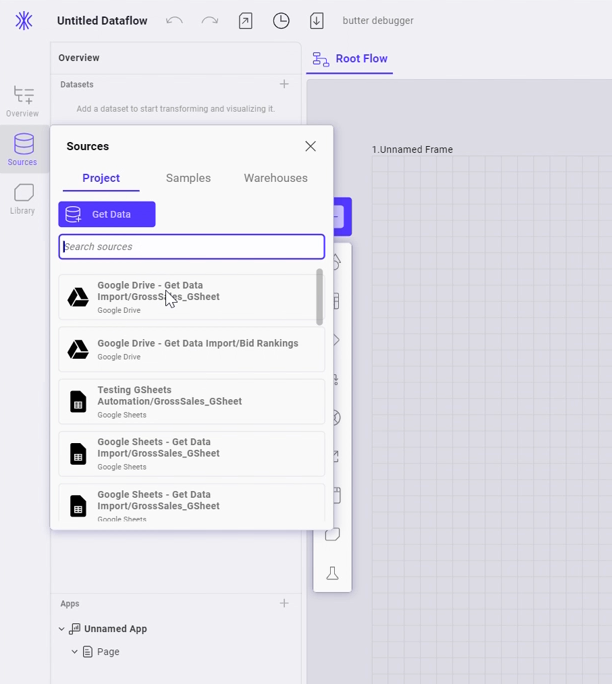
- Select the Sources panel on the left-handed menu and click Get data
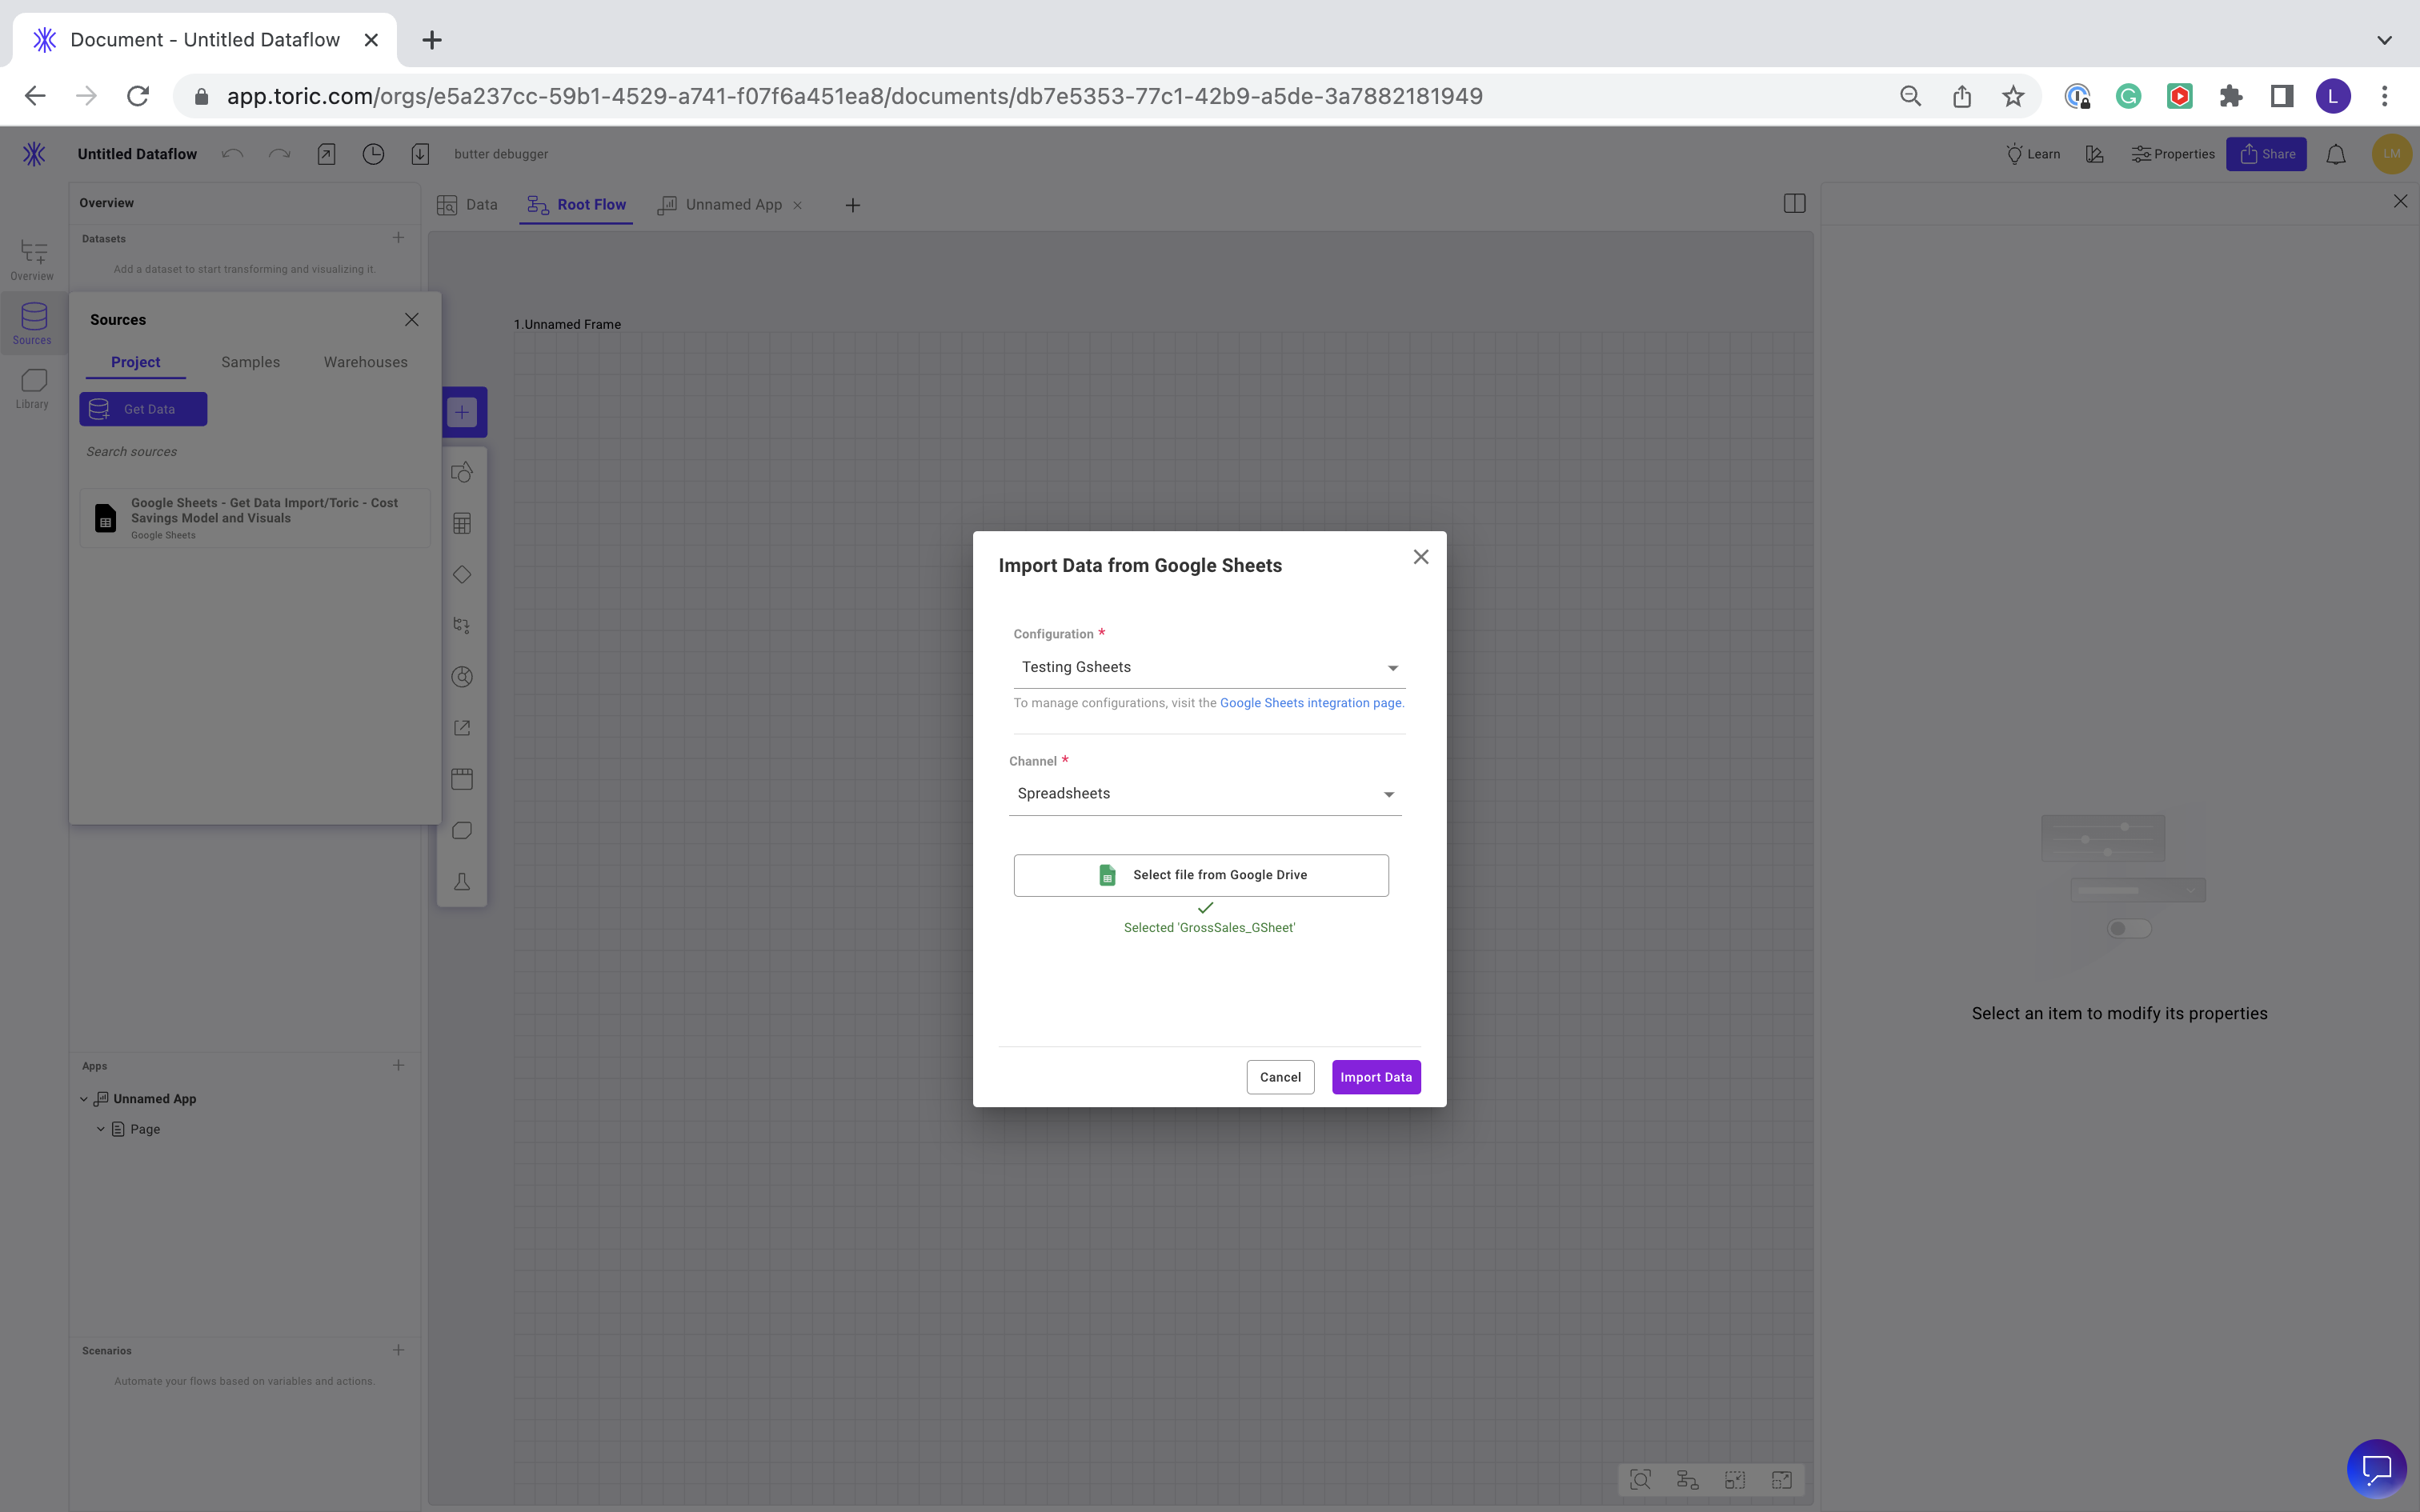
- Select the configuration you just created.

- Choose the specific sheet within the document that you want to import.
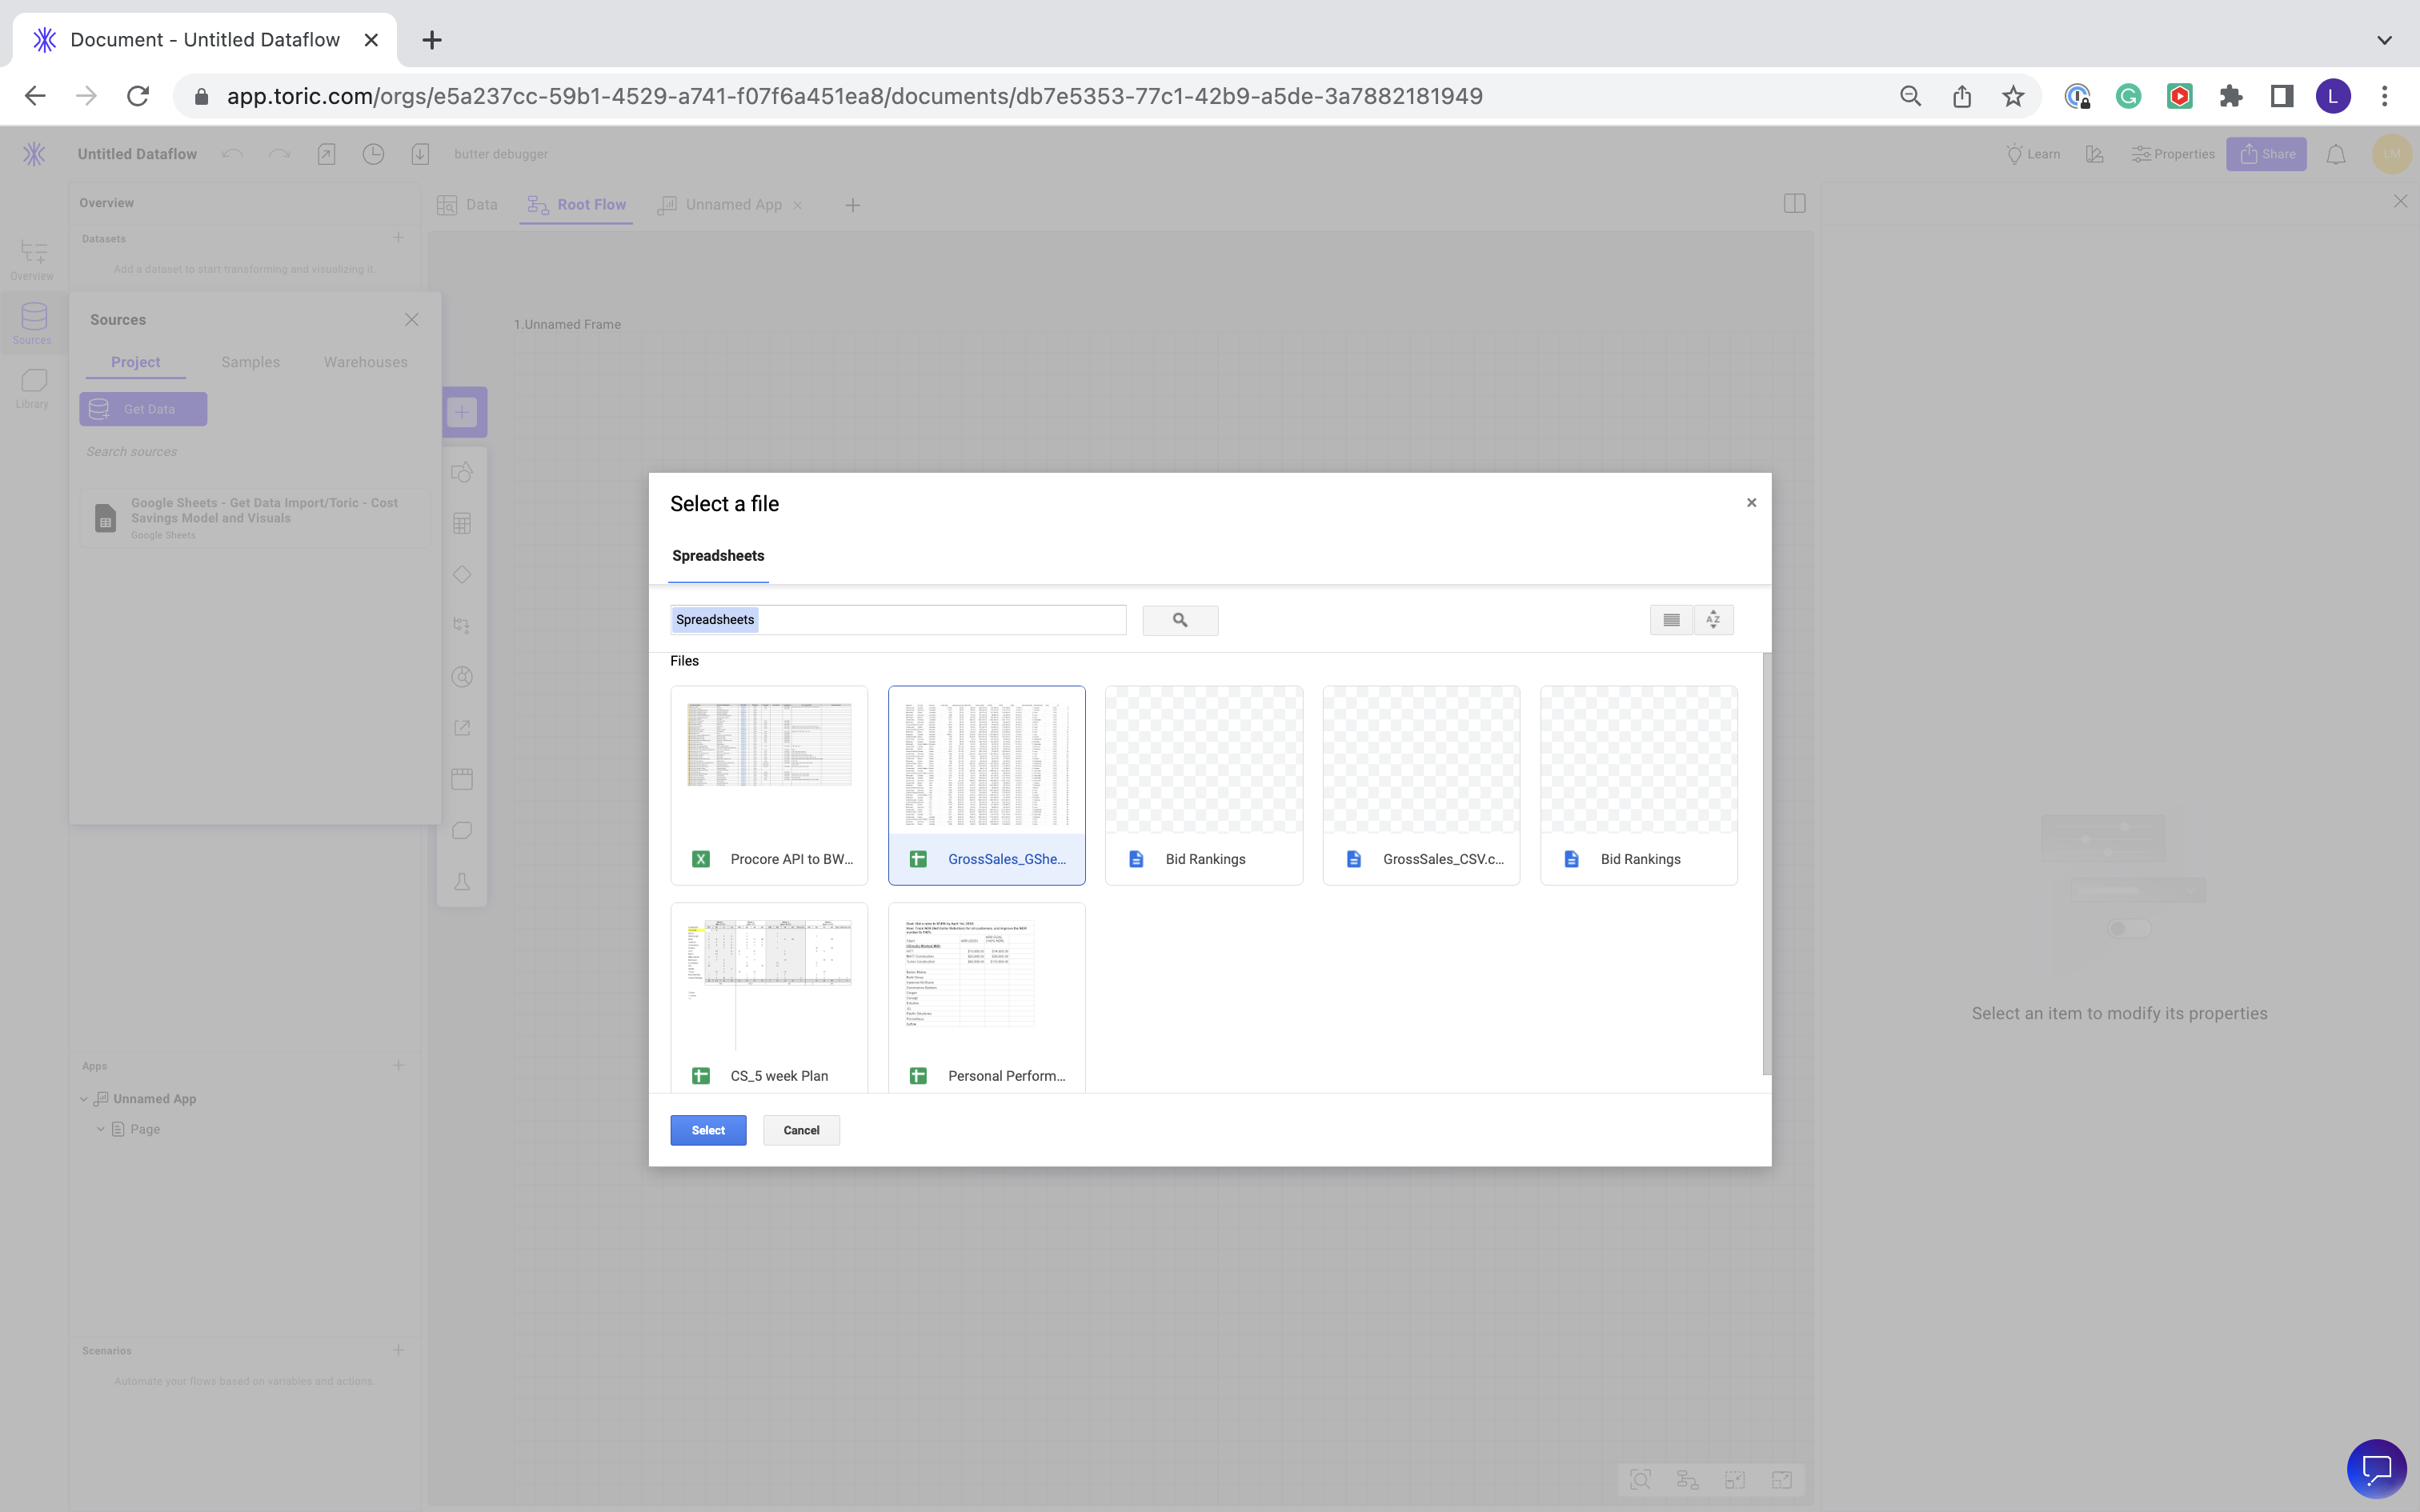
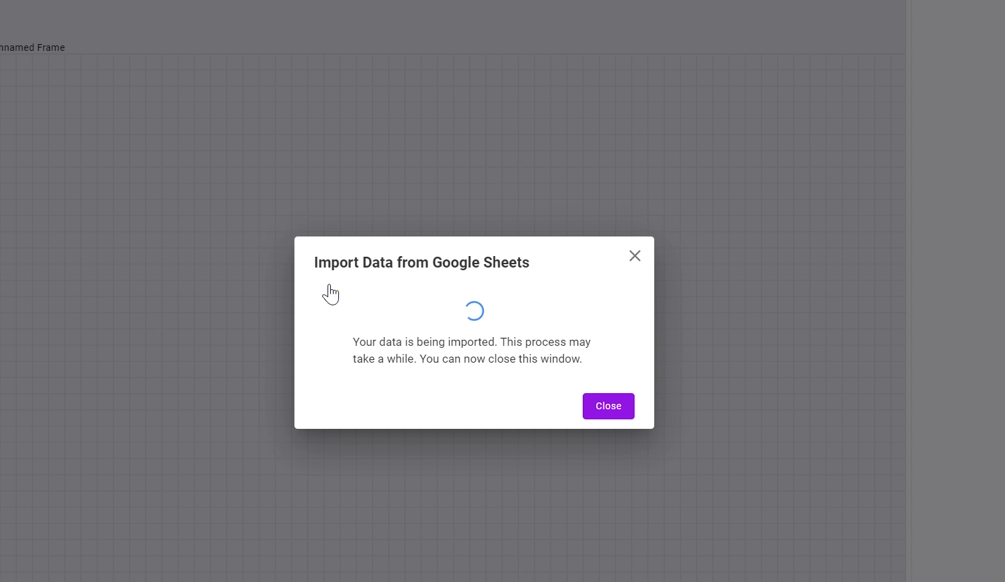
- Once your source sheet is selected, click Import data.
- You can close this window while your data is being imported.
- You will now see your sheet available in the Sources panel. Click and drag this sheet into your data flow.
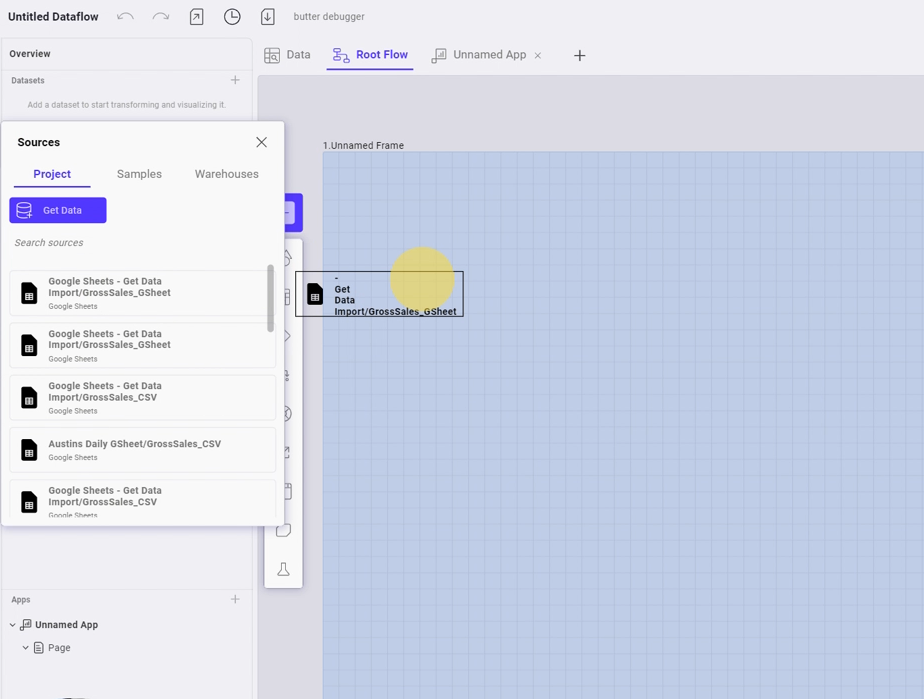
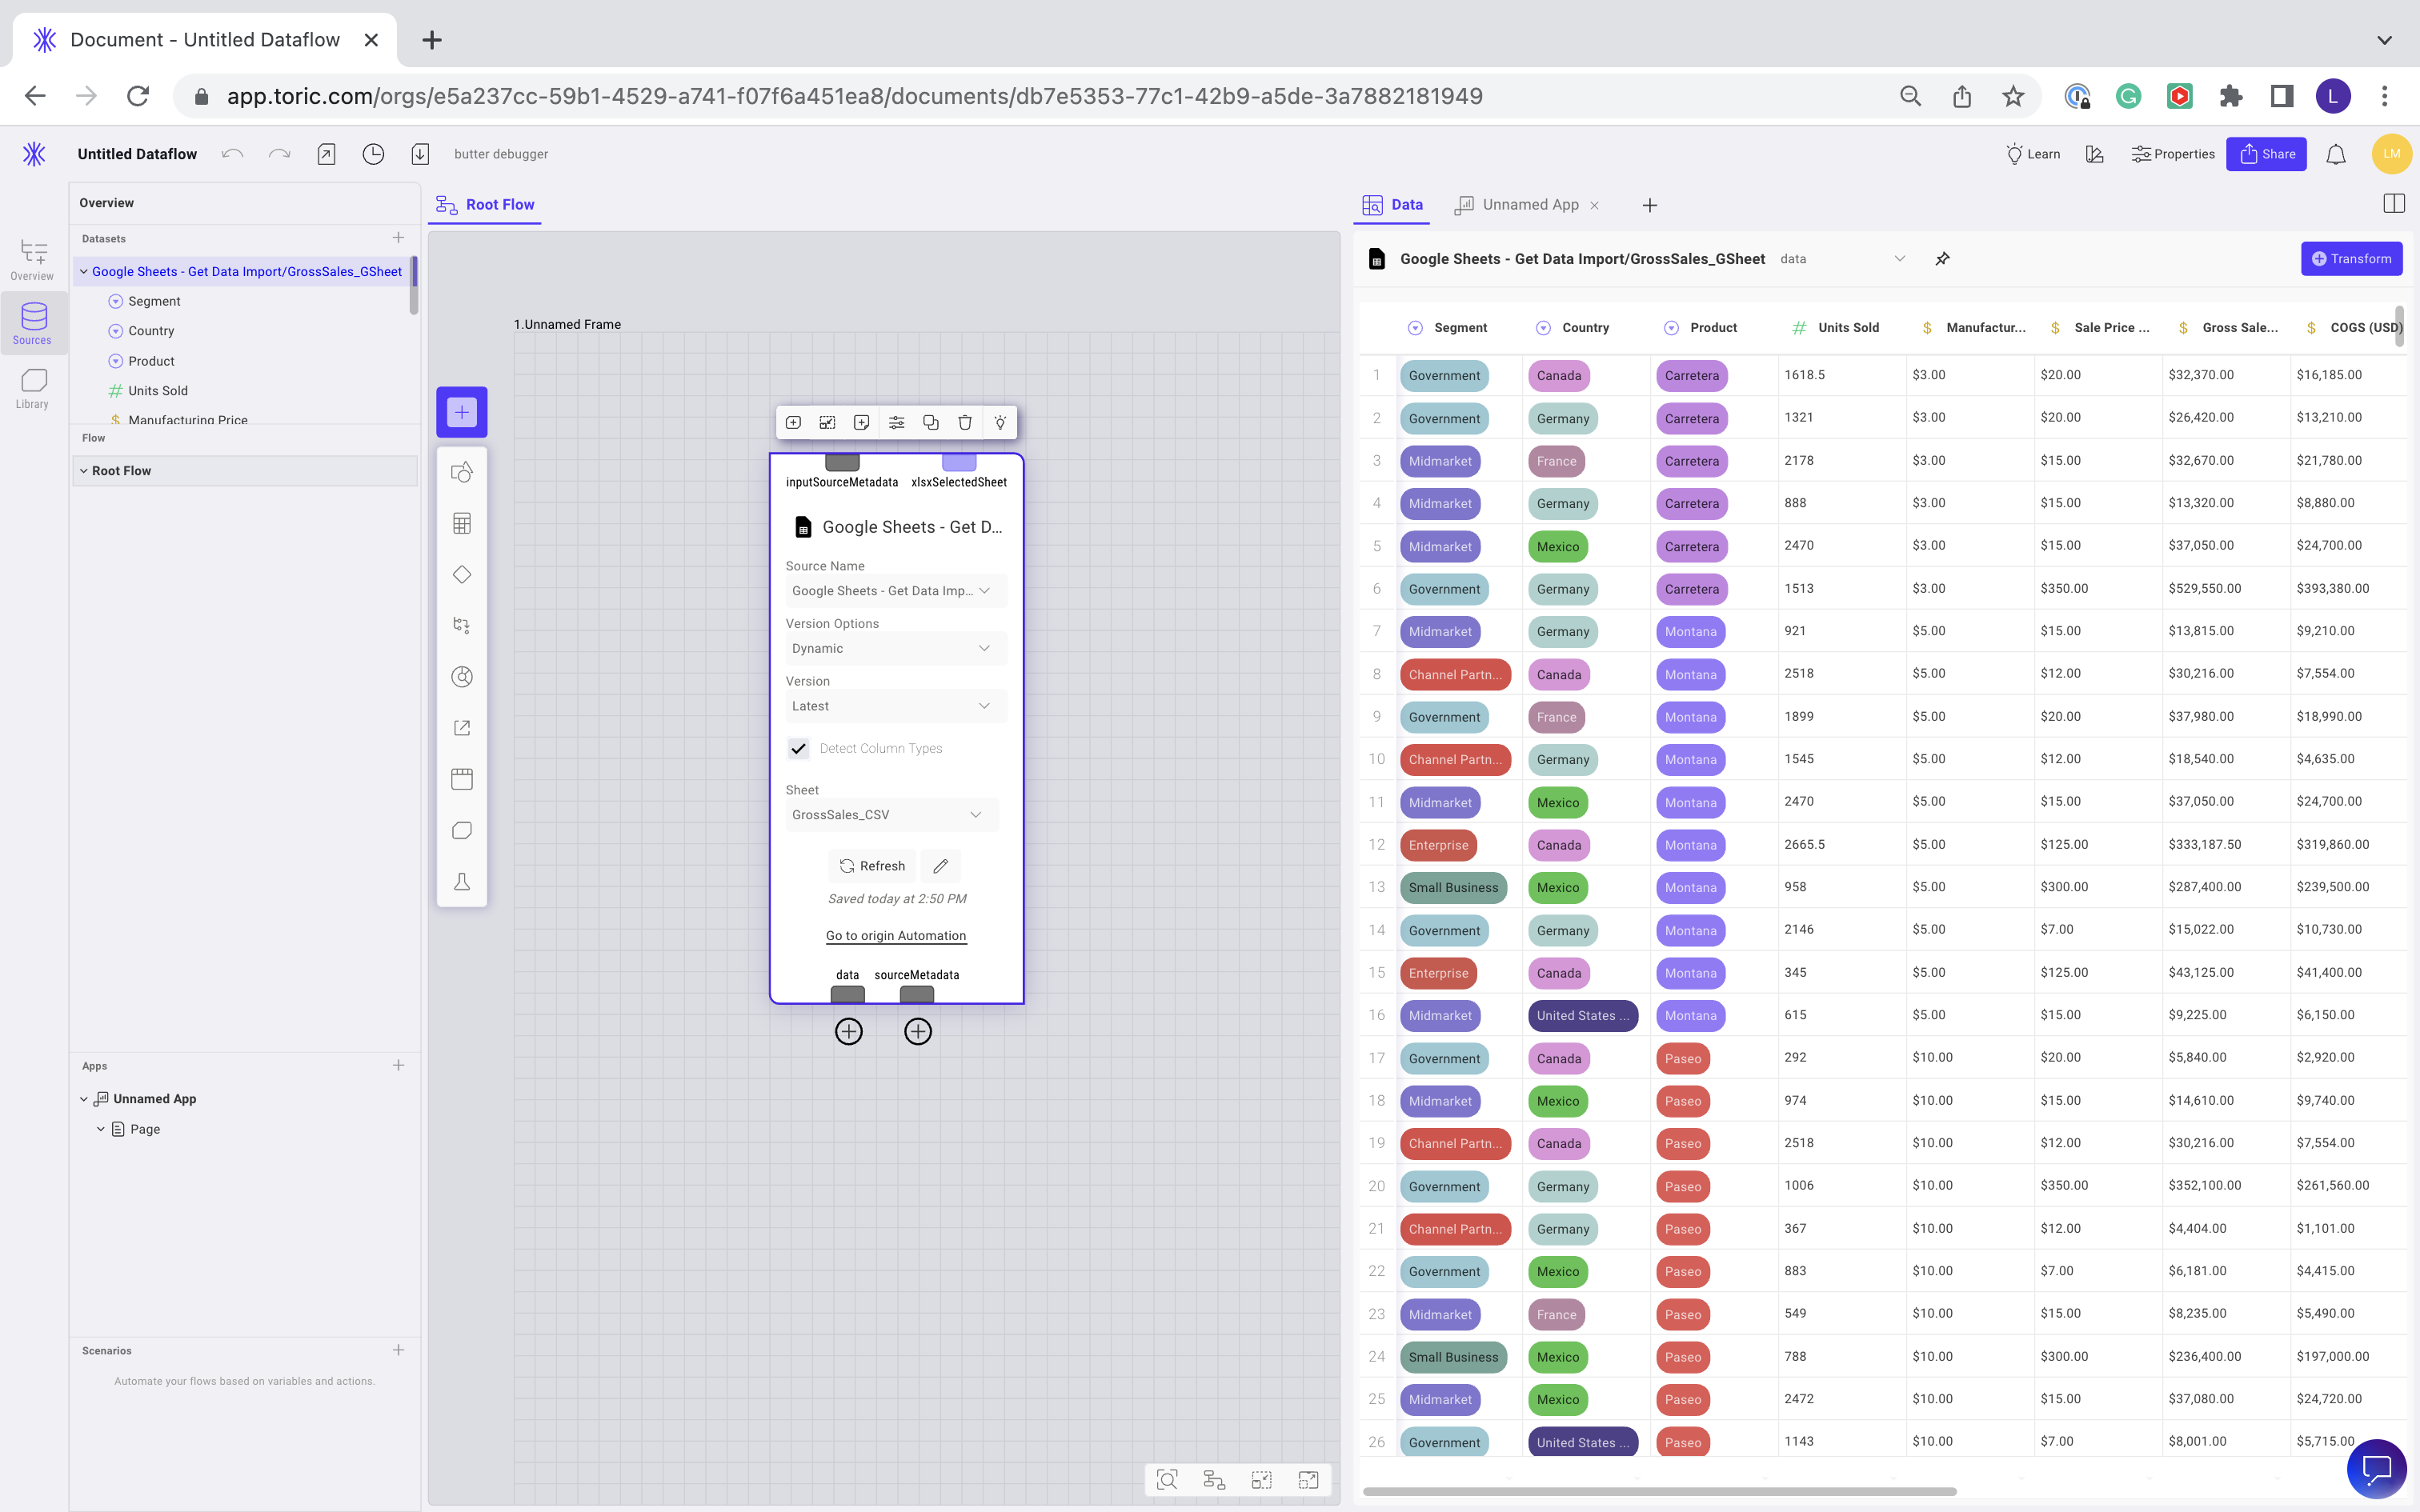
- This will automatically create a source node in your flow. Open the Split window to view and see changes live in an interactive data table.
That's it! Your Google Sheets is now connected to Toric, and you can start using Toric’s data engineering and visualization capabilities to create your reports and dashboards using Google Sheets. To see this connector in action, view or use our Facility Maintenance (7D BIM) template includes the Google Sheets connector. Note that this template also consists of the Revit connector, which is only available for paid users.
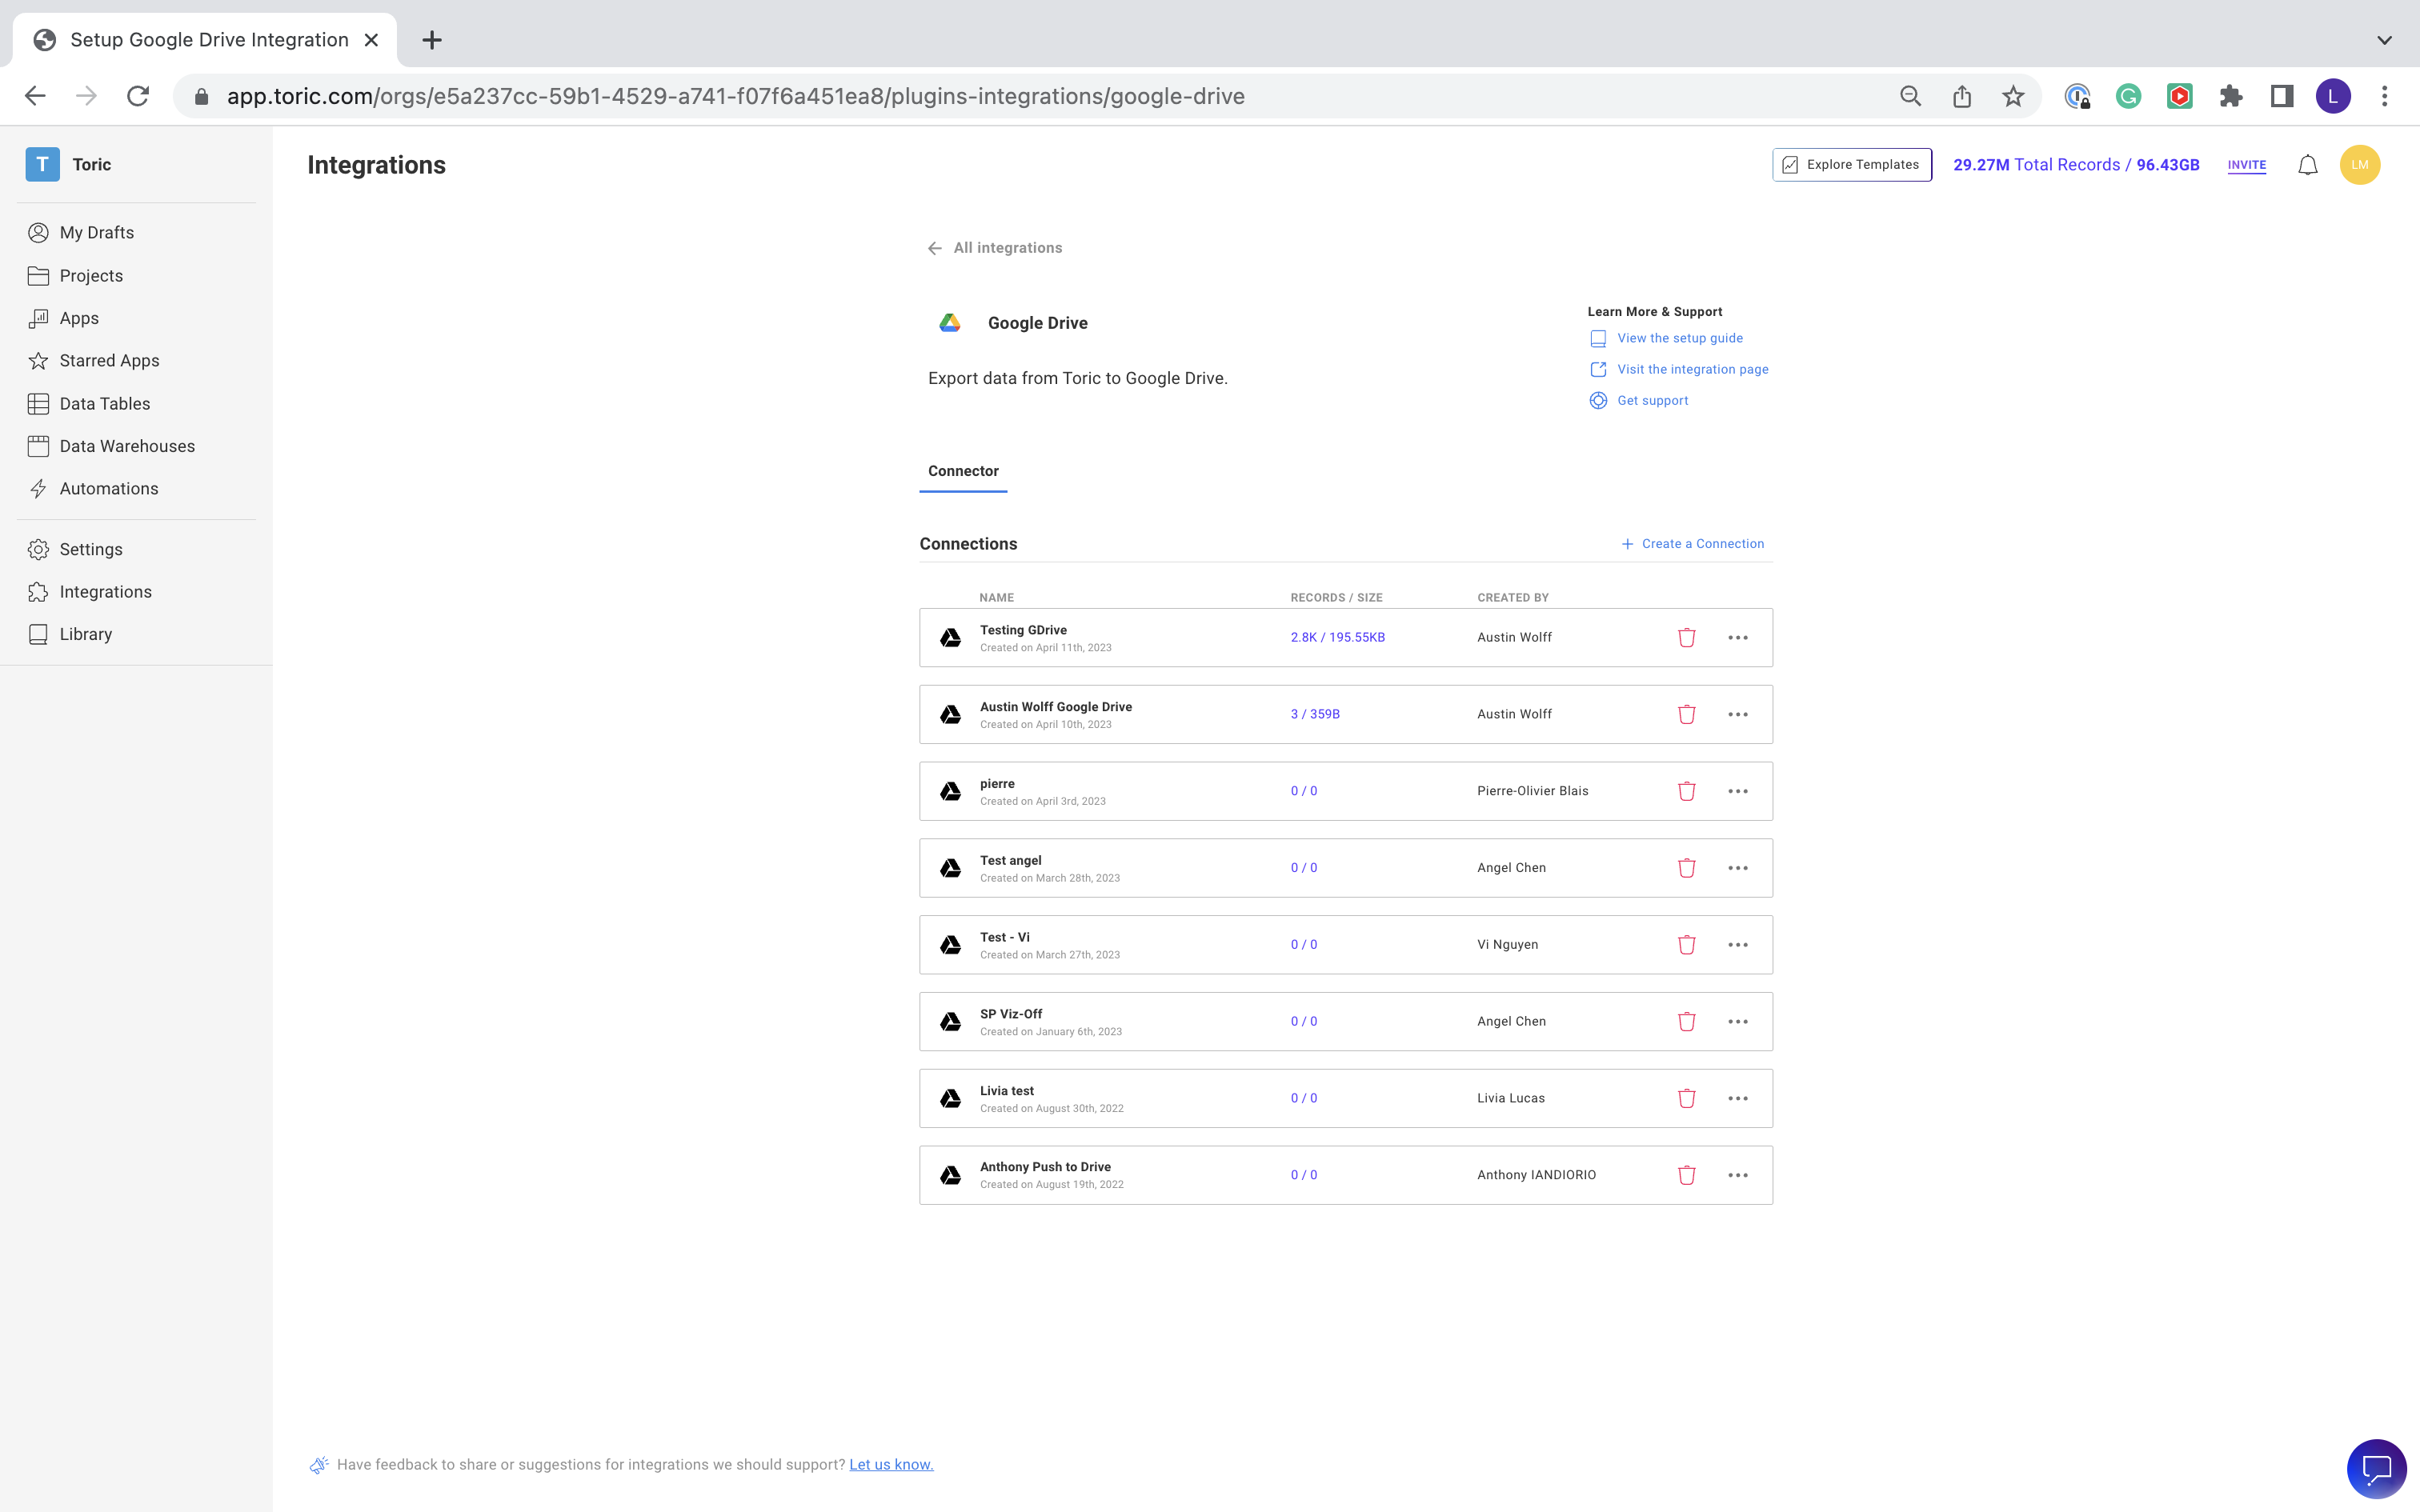
How to Configure Google Drive
Google Drive is another popular cloud-based storage platform many people use to store their project data. Configuring Google Drive in Toric is similar to configuring Google Sheets. Follow the steps below to configure your own Google Drive connection:
- Navigate to the Integrations tab on the left-hand menu. Follow these steps:
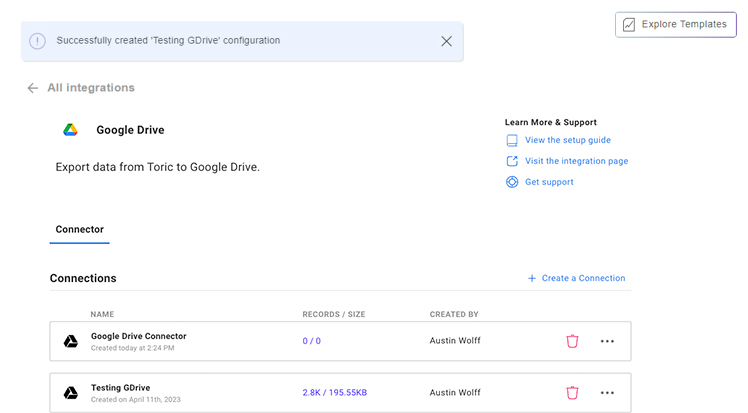
- Find Google Drive and click on Set up integration. You’ll see a screen showing Connections for Google Drive. Select Create a Connection.
- Give your connection a custom name.
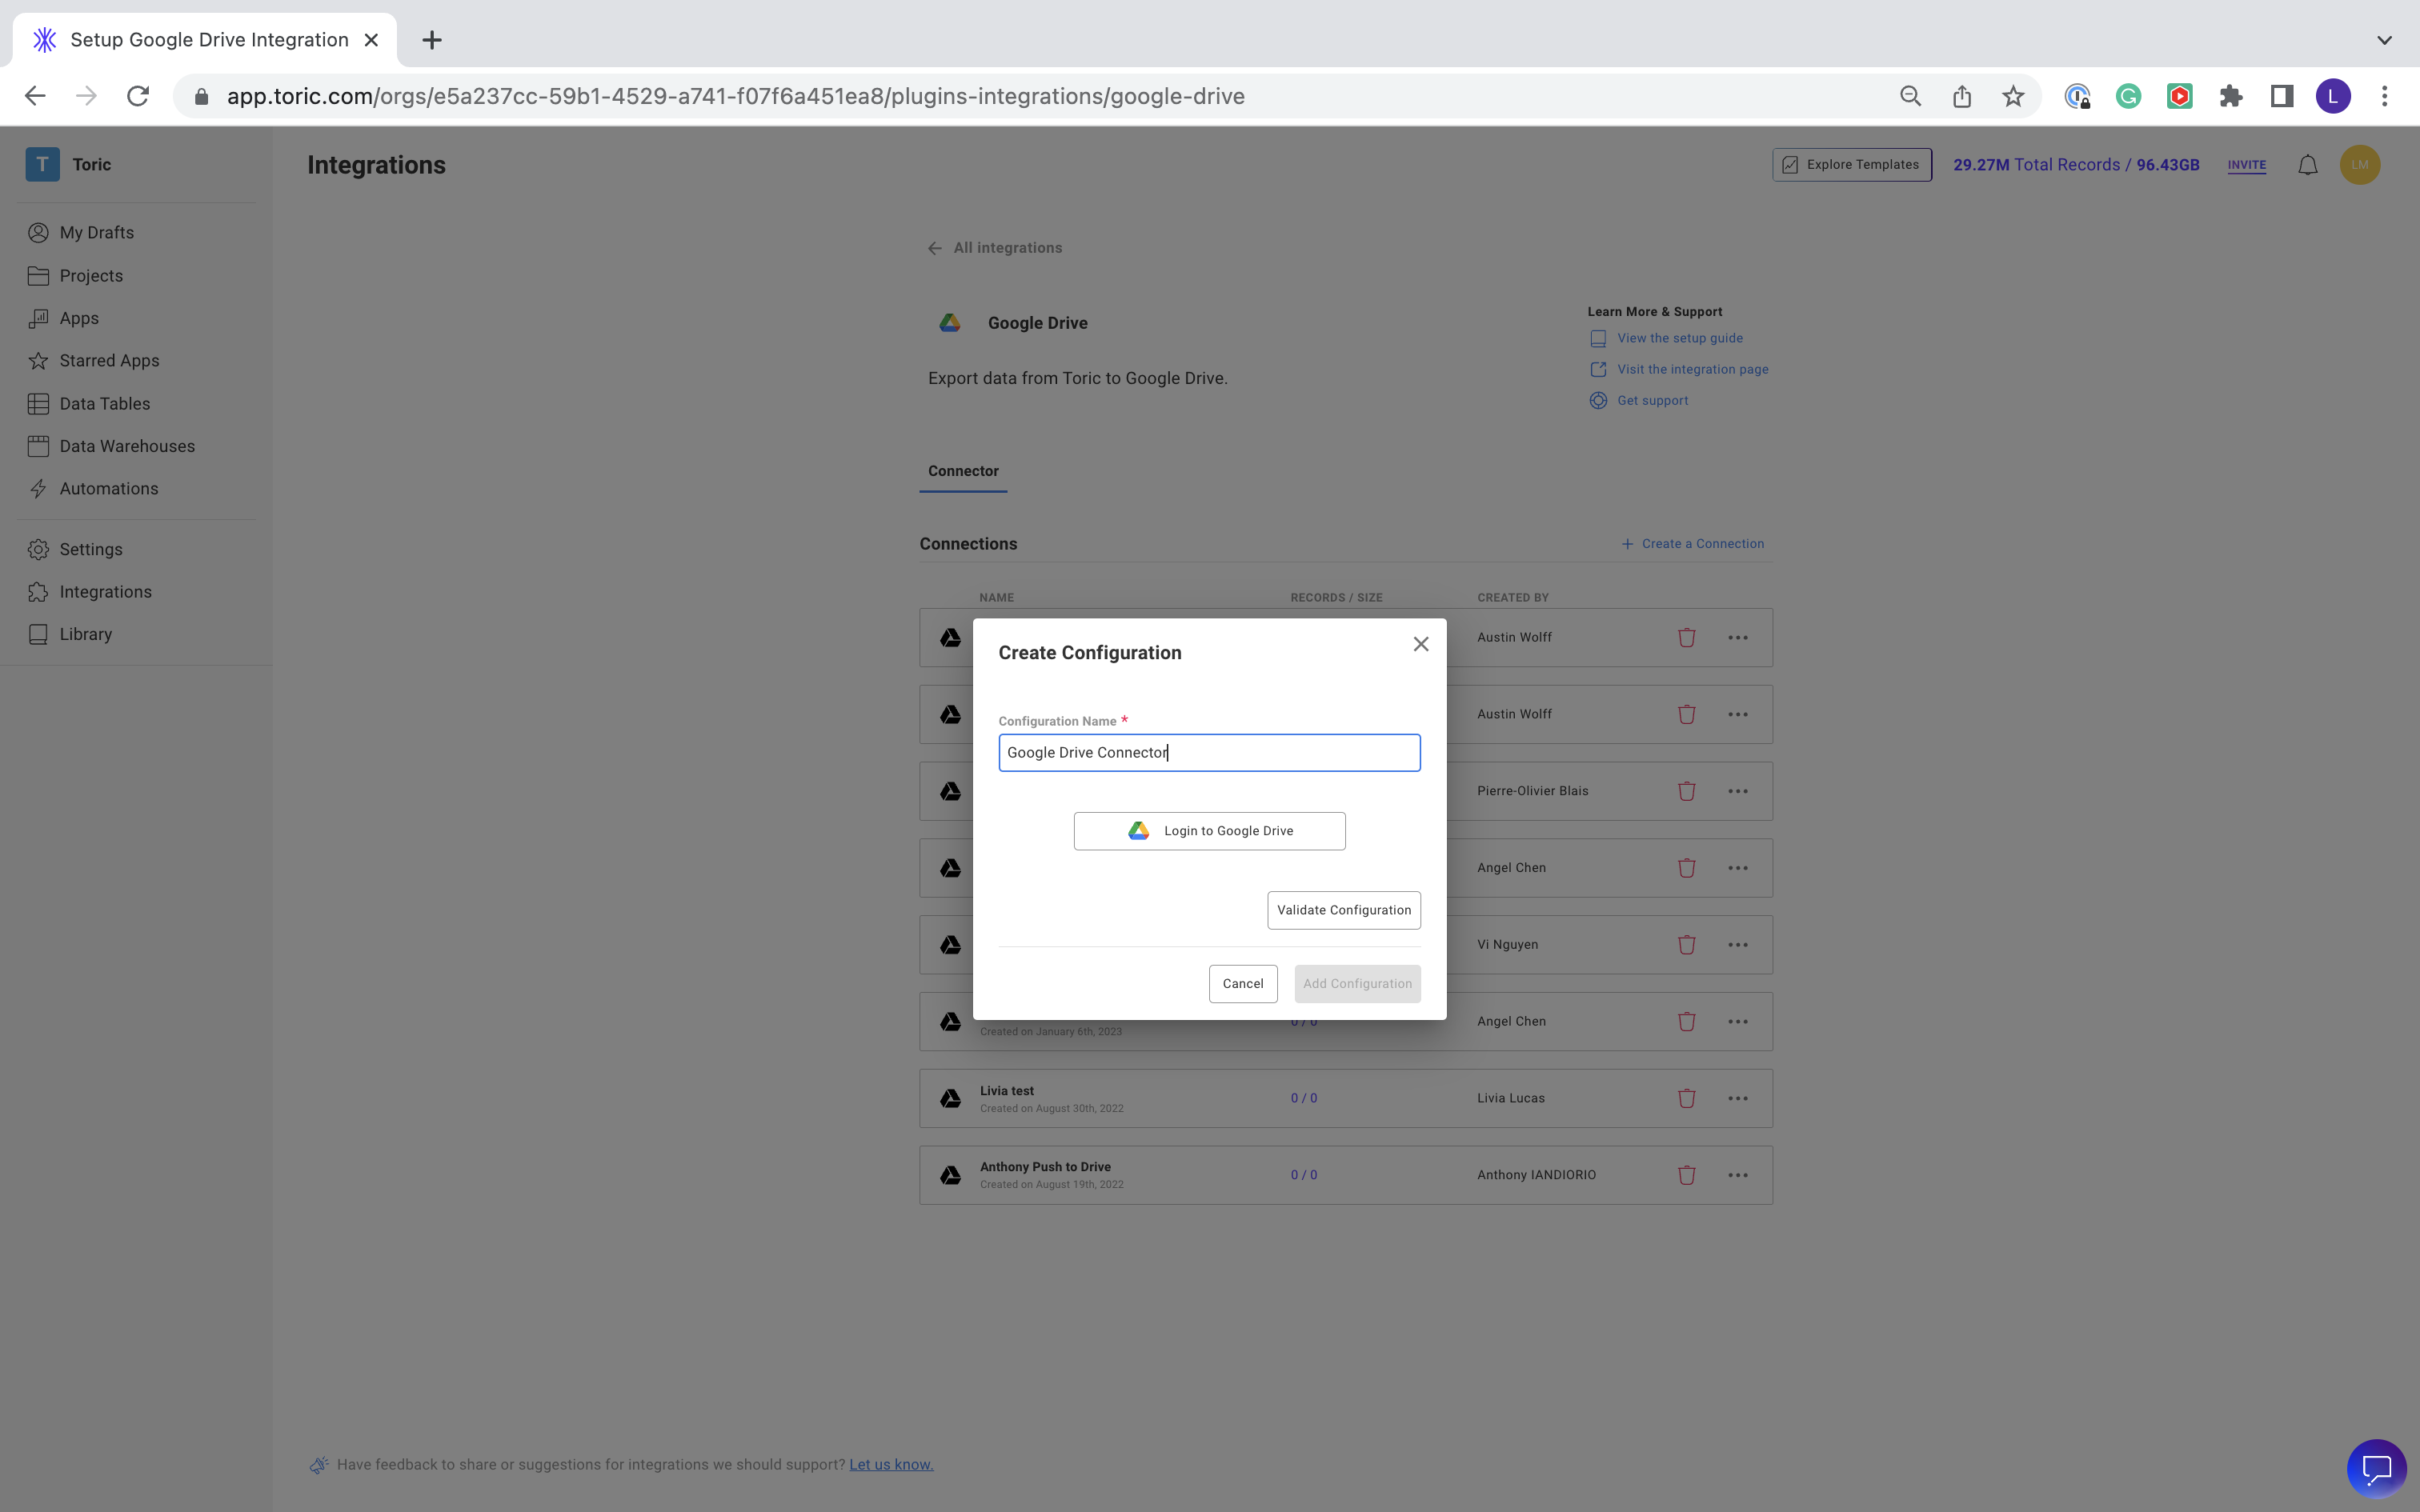
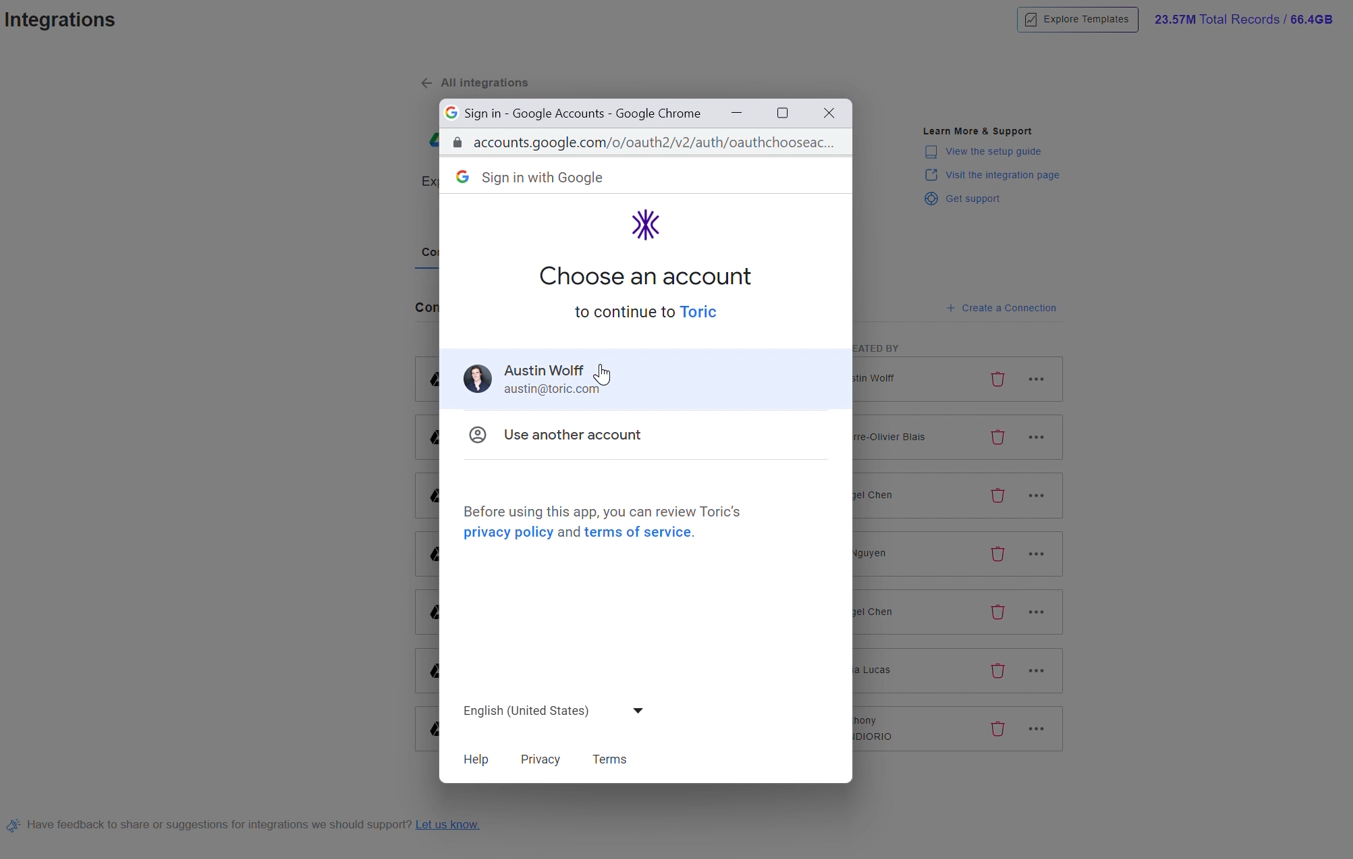
- Select Login to Google Drive. You will be prompted to log in with your Google credentials.
- Once you have logged in and granted access, validate your configuration.
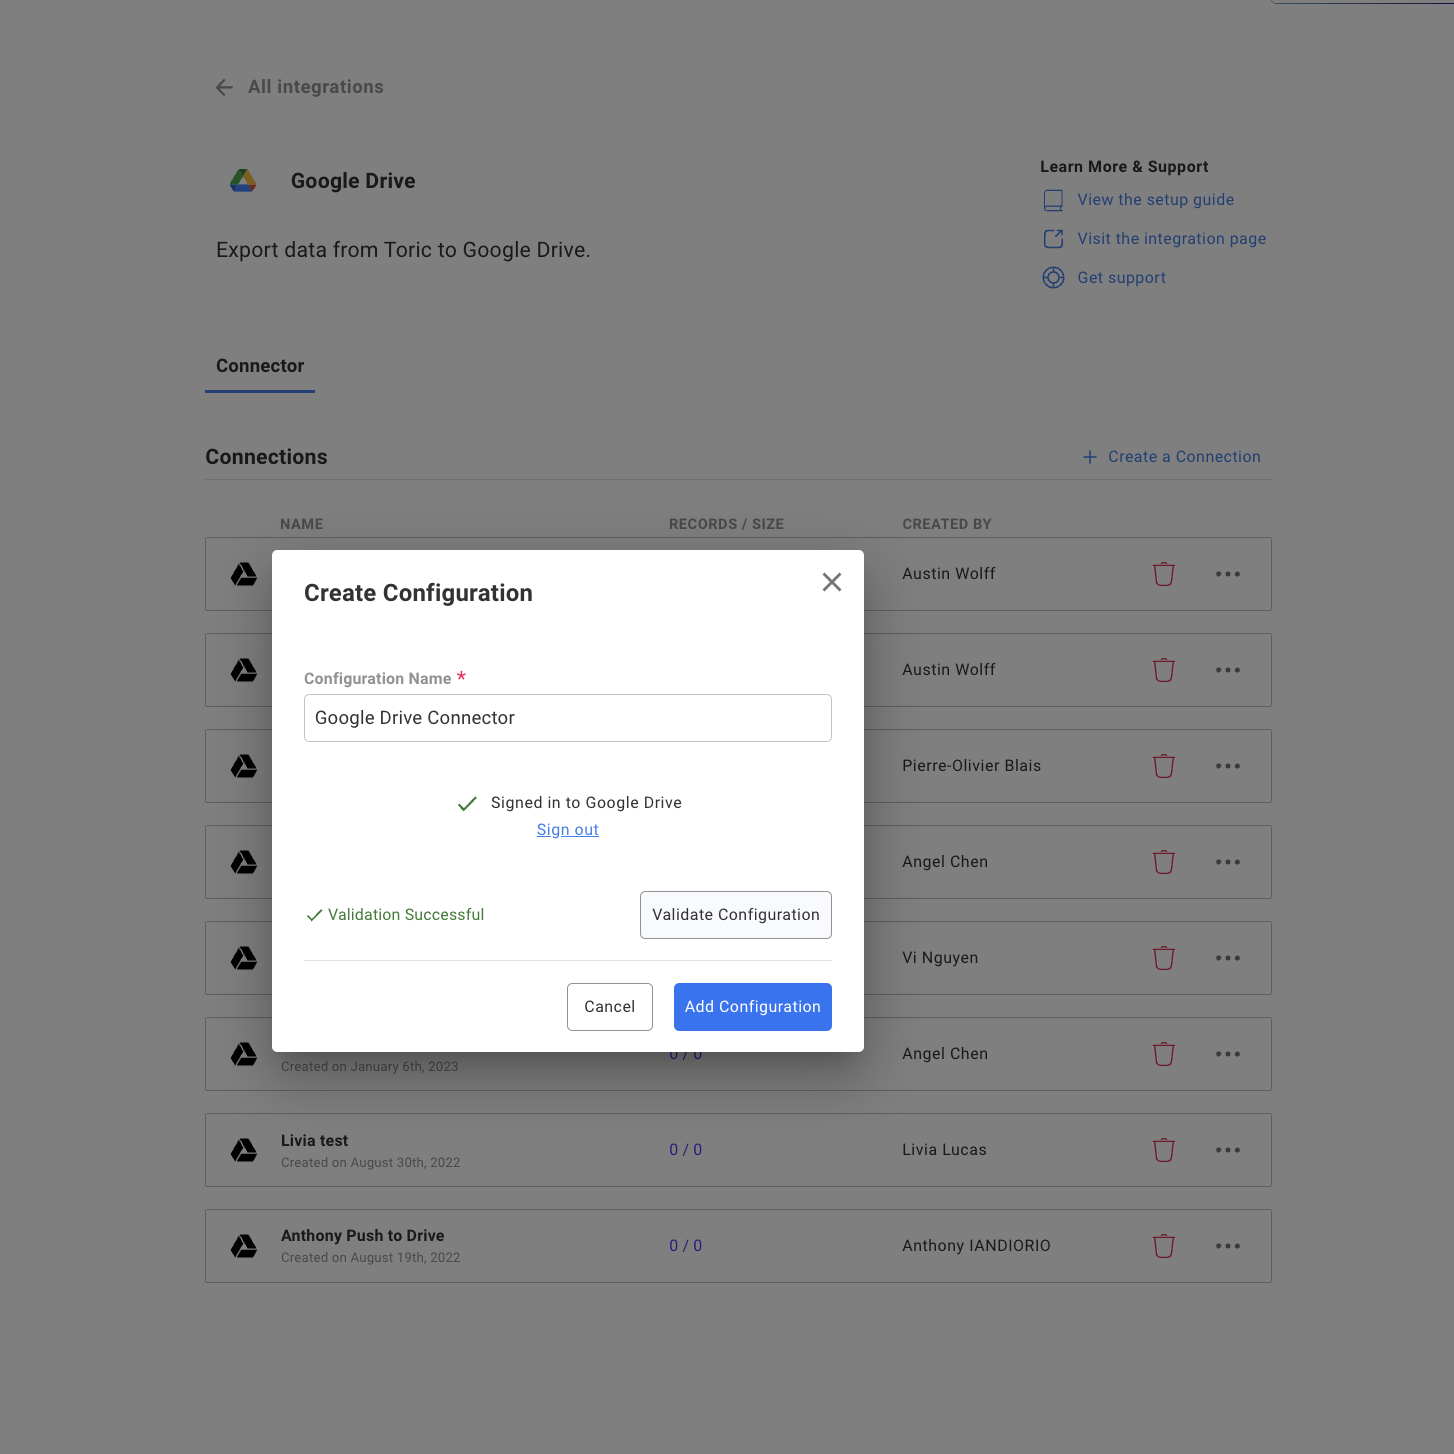
- Click add configuration. You will see a notification at the top of your screen, and your configuration will now be listed below Connections.
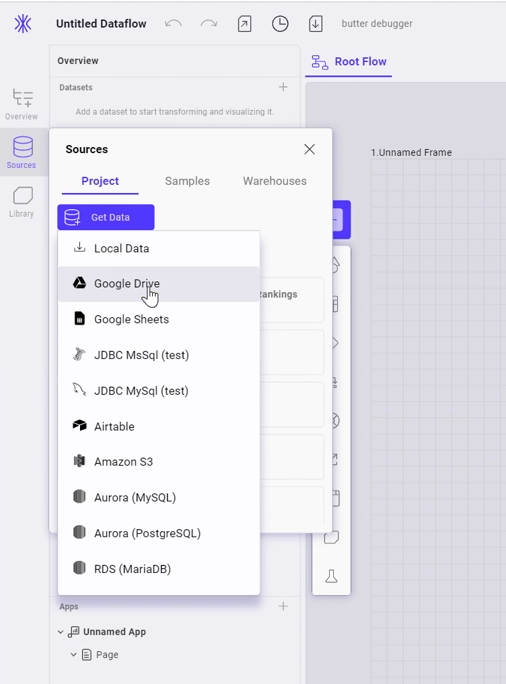
- Now let’s import the data into a workflow. Create a new data flow or open an existing one.

- Click on the "Sources" tab in the left-hand navigation bar of your Toric dashboard. Select Get data and click on the Google Drive option.
- Select the configuration you just created.
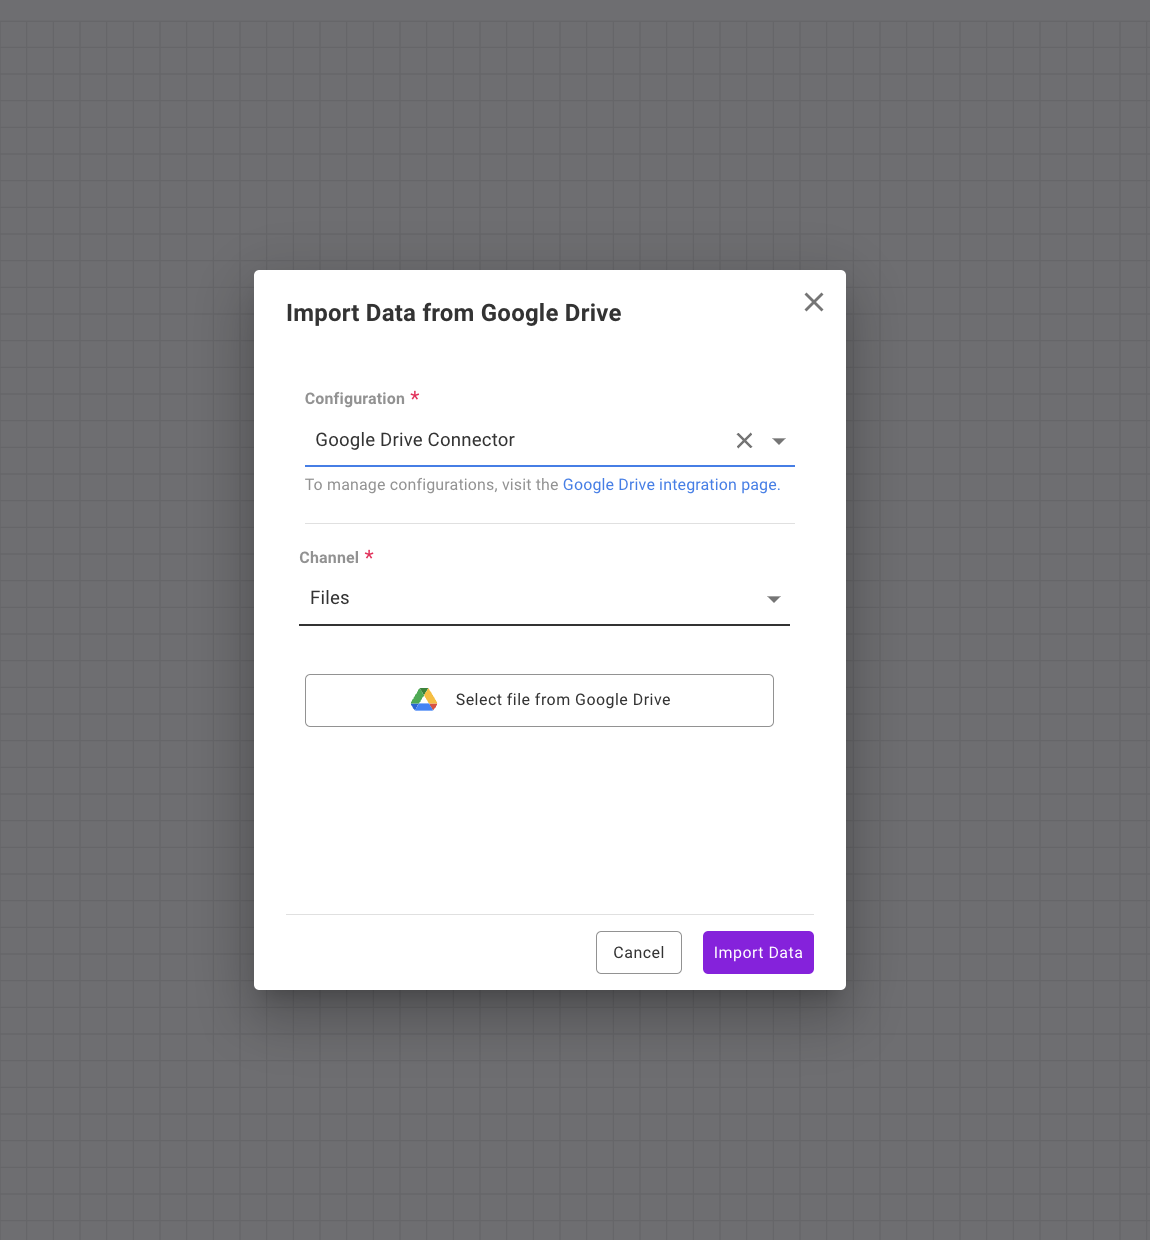
- Click Select file and follow the steps to select the file you want to import.
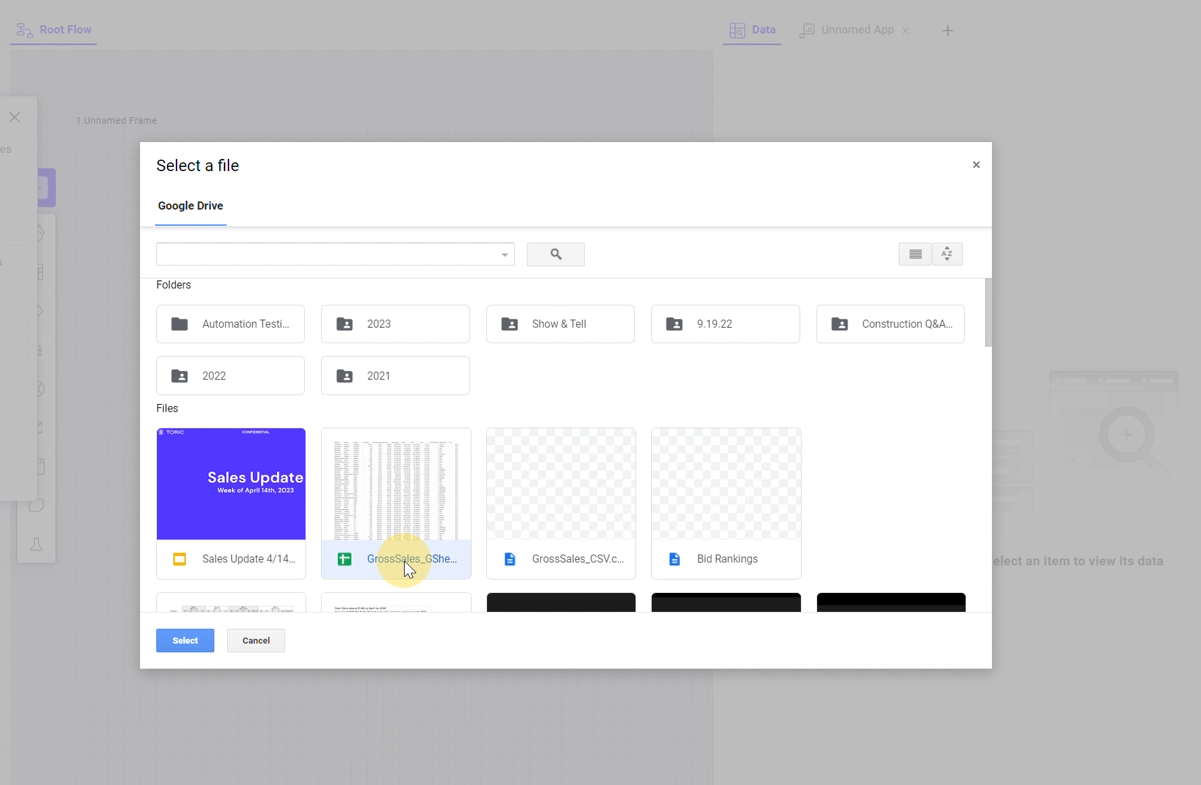
- Once your data is selected, wait for it to finish importing.

- Once your data is imported, it will appear in the left-handed Sources tab.
- Drag your Google Drive file into the flow, and this will automatically create a source node. Use the Split view workspace to see your data and transformations in an interactive data table.
Your Google Drive file(s) are now connected to Toric, and you can start analyzing and visualizing your data. Remember, free users do not have access to automation, so you will have to leverage the Refresh or Get data buttons in the workspace to ingest new versions of data.
Upgrade to a Pro account
Are you a free user looking to unlock more of Toric's capabilities? You can do so yourself right within the workspace!
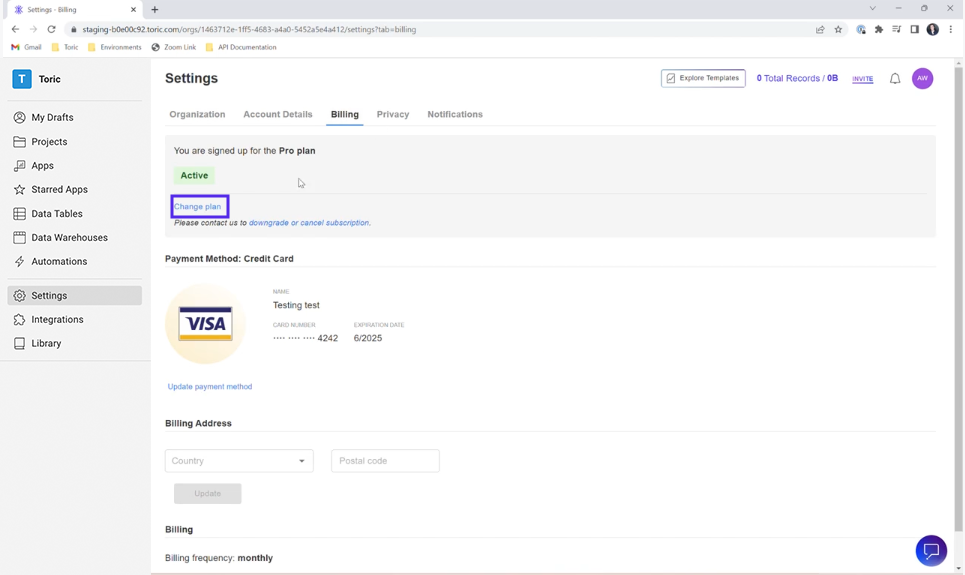
- Navigate to Settings and select Billing. Click on Change Plan under your subscription details.
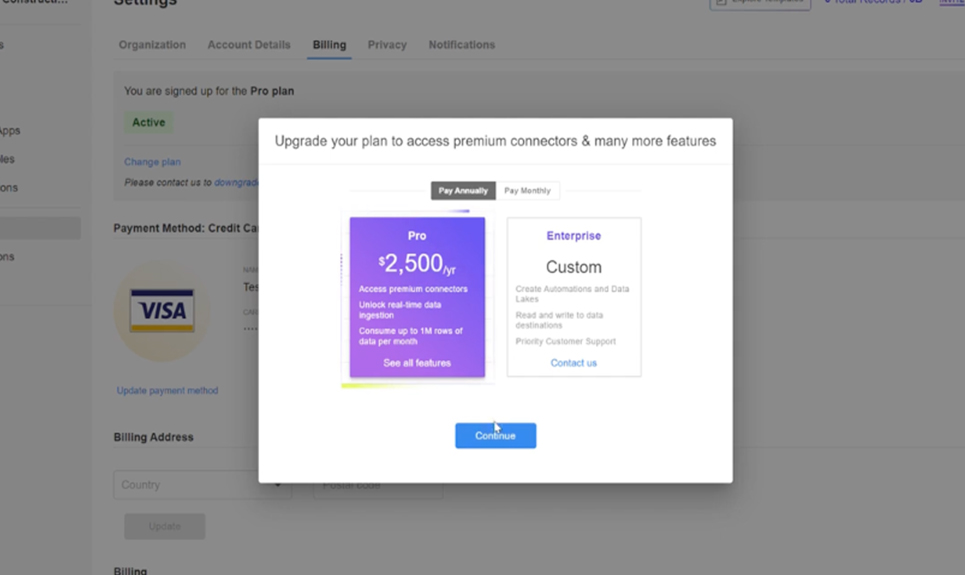
- Select the plan you would like to upgrade to.
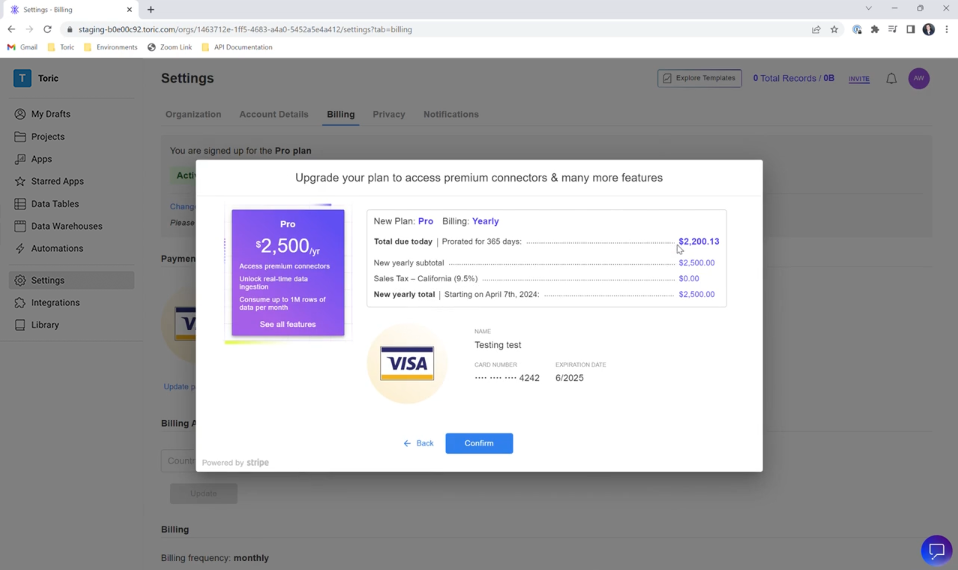
- Enter your payment details.
You have no unlocked access to Toric's pro plan and its features! Pro users have access to the following:
- 50+ Connectors
- 1M rows of data ingestion
- Real-time Ingestion
- Incremental Ingestion
- Configurable data storage
- And community-based support
Watch the full video below and upgrade to a Pro plan today!
Now you’re ready to get started with Toric!
That's it! By now, you should know how to import your data into Toric using a local CSV or Excel file. We hope this tutorial has been helpful in getting you started with Toric's free plan and standard sources.
If you haven't already, we encourage you to sign up for a free account and start exploring the workspace with courses videos. With Toric, you can easily visualize your project and business data, and derive insights that can drive better decision-making.
And if you need any help getting started, don't hesitate to request a demo with our team to learn more about how Toric can help you manage your projects more efficiently. Try out Toric for free today and see for yourself the power of our all-in-one data analytics workspace!
.png)


.png)


